Step 1: Connect Cameras to the Switch
- Switch Connection: Connect all cameras using the appropriate cable extensions to a switch, which should be a Power over Ethernet (PoE) switch. Ensure that the capturing PC is also connected to this switch.
- Connection Details: For detailed instructions on proper camera connection, refer to the respective guides for OAK W PoE cameras.
Step 2: Camera Placement
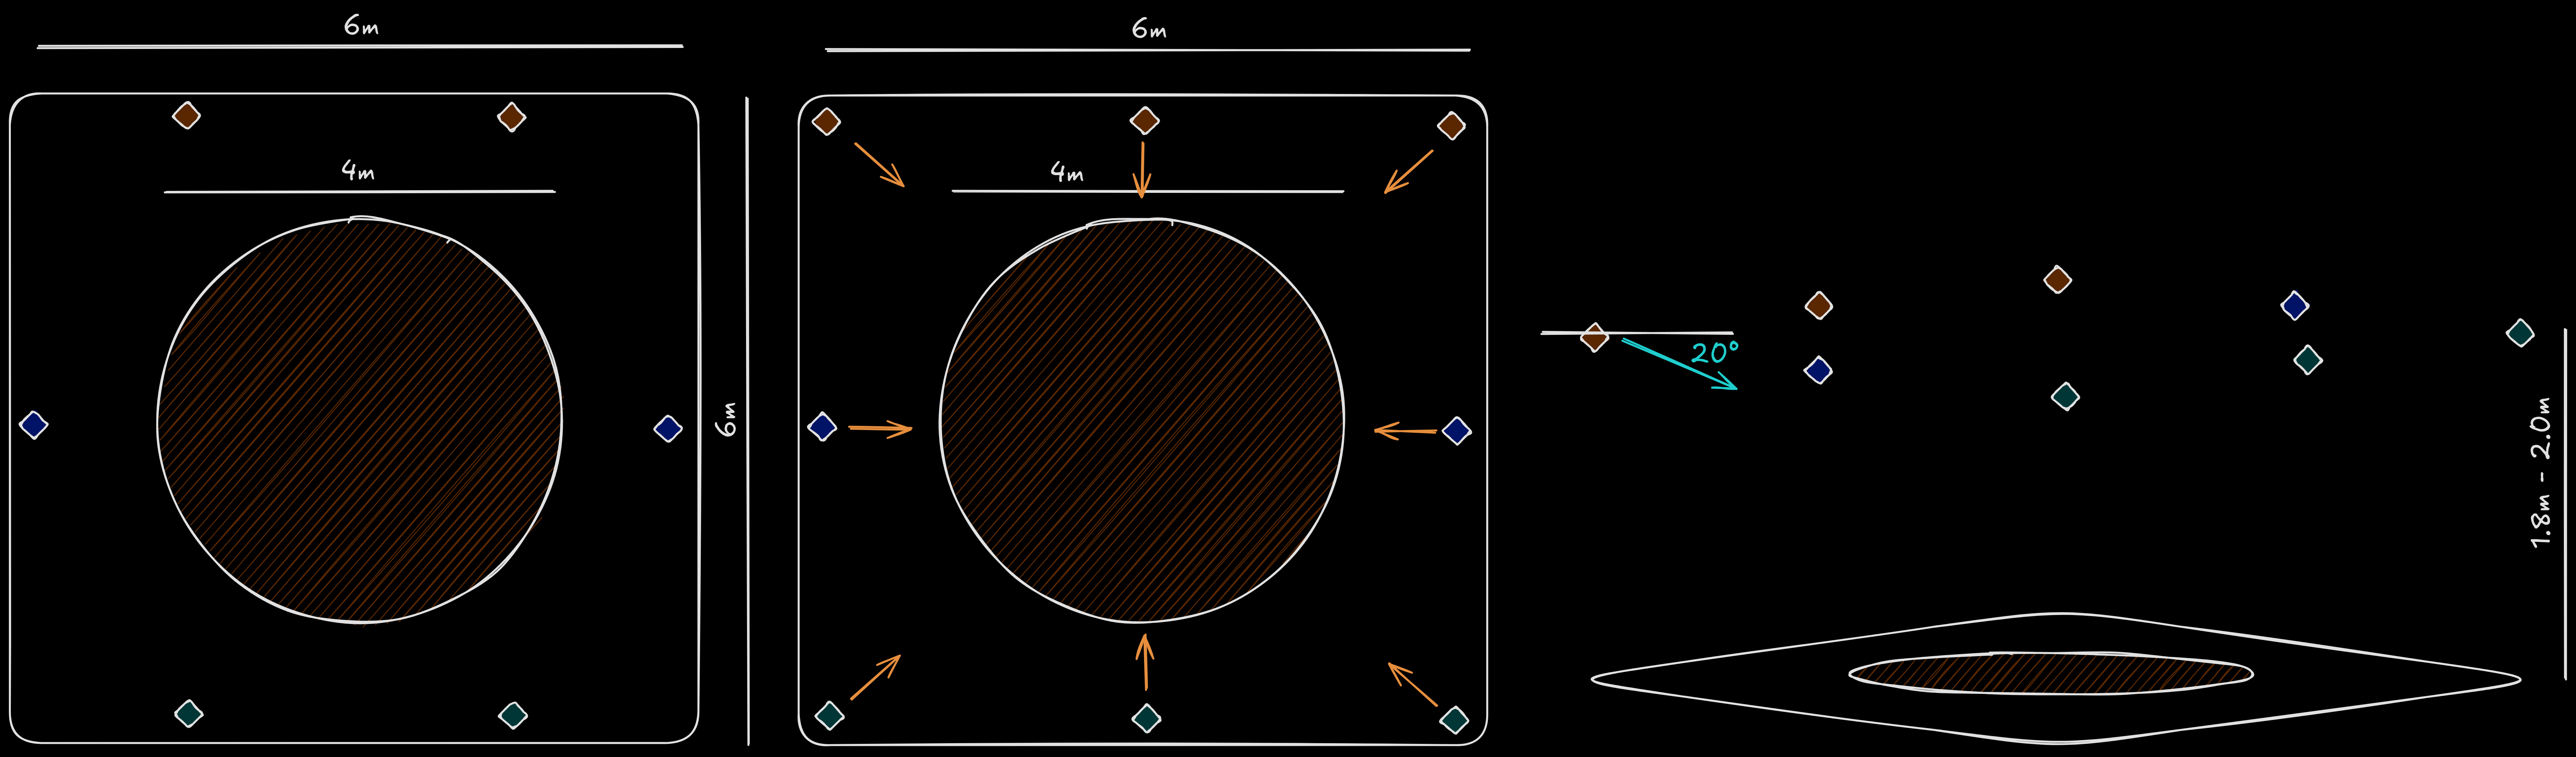
- Setup Area: It is recommended to use a 6m by 6m free space for the camera setup. Arrange 6 cameras in a circular shape, all looking towards the center of the capturing space. This arrangement optimizes the coverage and results in an actual performance space of 4m x 4m.
- Placement Details: Details regarding the recommended camera placement are depicted in the figure below. However, it is important to mention that the setup can and should be adapted based on the needs of each use case.

Step 3: Validate Camera Placement
- Performance Check: To validate the placement, have a subject move in the space. Optimal placement is indicated when the subject is clearly visible simultaneously across the different camera views. The best outcome is achieved when all cameras can see the subject at the same time. More details can be found in the respective section.
Step 4: Calibration
- Calibration Process: After ensuring the cameras are properly placed, proceed with calibrating the system. Calibration is crucial for accurate motion capture.
- Calibration Guide: More details about the calibration process can be found here.
Step 5: Initialize Capture and Start Tracking
- Initialize Capture: With the cameras set up and calibrated, the subject can enter the capturing space and you are ready to initialize capture by clicking the Body Calibration icon:
- Start Tracking: After showing the body in the 3D viewer and the subject is in A-pose at the middle of the capturing space, you can start tracking by clicking the Motion Tracking icon:
Step 6: Stream or Reprocess MoCap data
- Once the setup is complete, you are ready to stream the data live or record performances. Recorded data can be reprocessed on the cloud for enhanced accuracy and quality. Ensure that each step is carefully followed to maximize the system’s capabilities.