Getting Started with Moverse Capture
Welcome to Moverse Capture, the leading software for 3D character animation and motion capture. This guide will help you get started quickly, from installation to making your first animated content and/or MoCap project. Whether you are a beginner or an experienced user, these steps will ensure you have everything set up for success.Introduction
Moverse Capture is designed to help you create natural and diverse 3D animations at scale. With advanced features like resource-efficient real-time MoCap and intelligent 3D animation editing tools, you can bring your creative visions to life more efficiently.Requirements
Before installing Moverse Software, ensure your have the following equipment:Equipment for Moverse Capture
- 8 x Luxonis Cameras: We officially support OAK-1 W PoE, and OAK-D W PoE.
- 9 x Cat6 20m RJ45 Cables
- (Only for OAK-D W PoE) — 8 x Cat6a Keystone RJ45 Coupler, Shielded, Female to Female
- 10-Port Multi-Gigabit Ethernet Switch 1Gbps PoE+
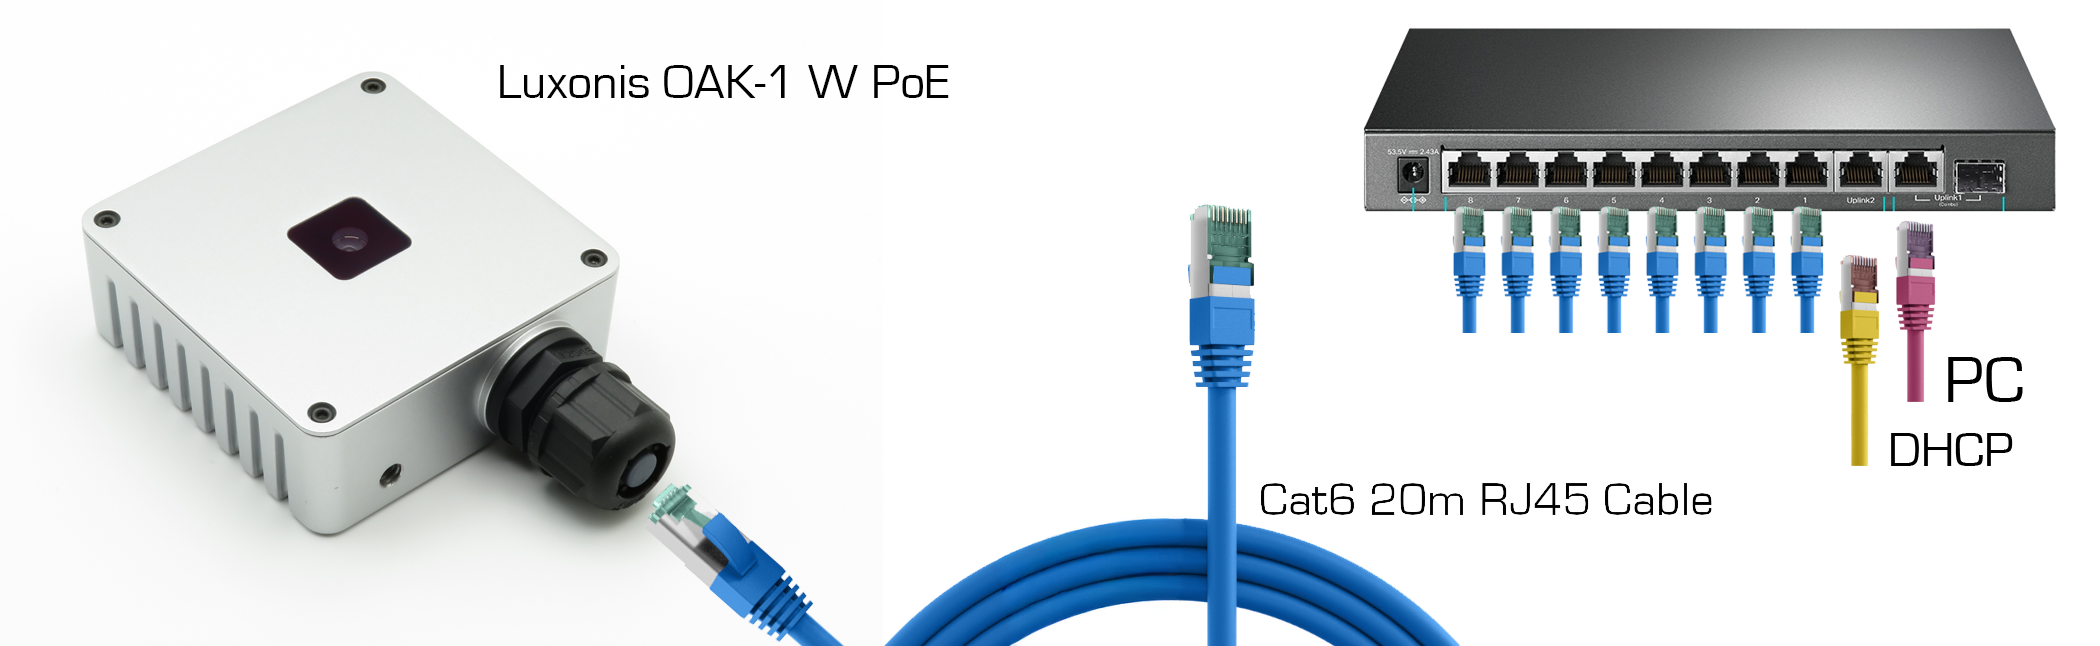
Proper OAK-1 W PoE camera connection with the required parts and the switch.
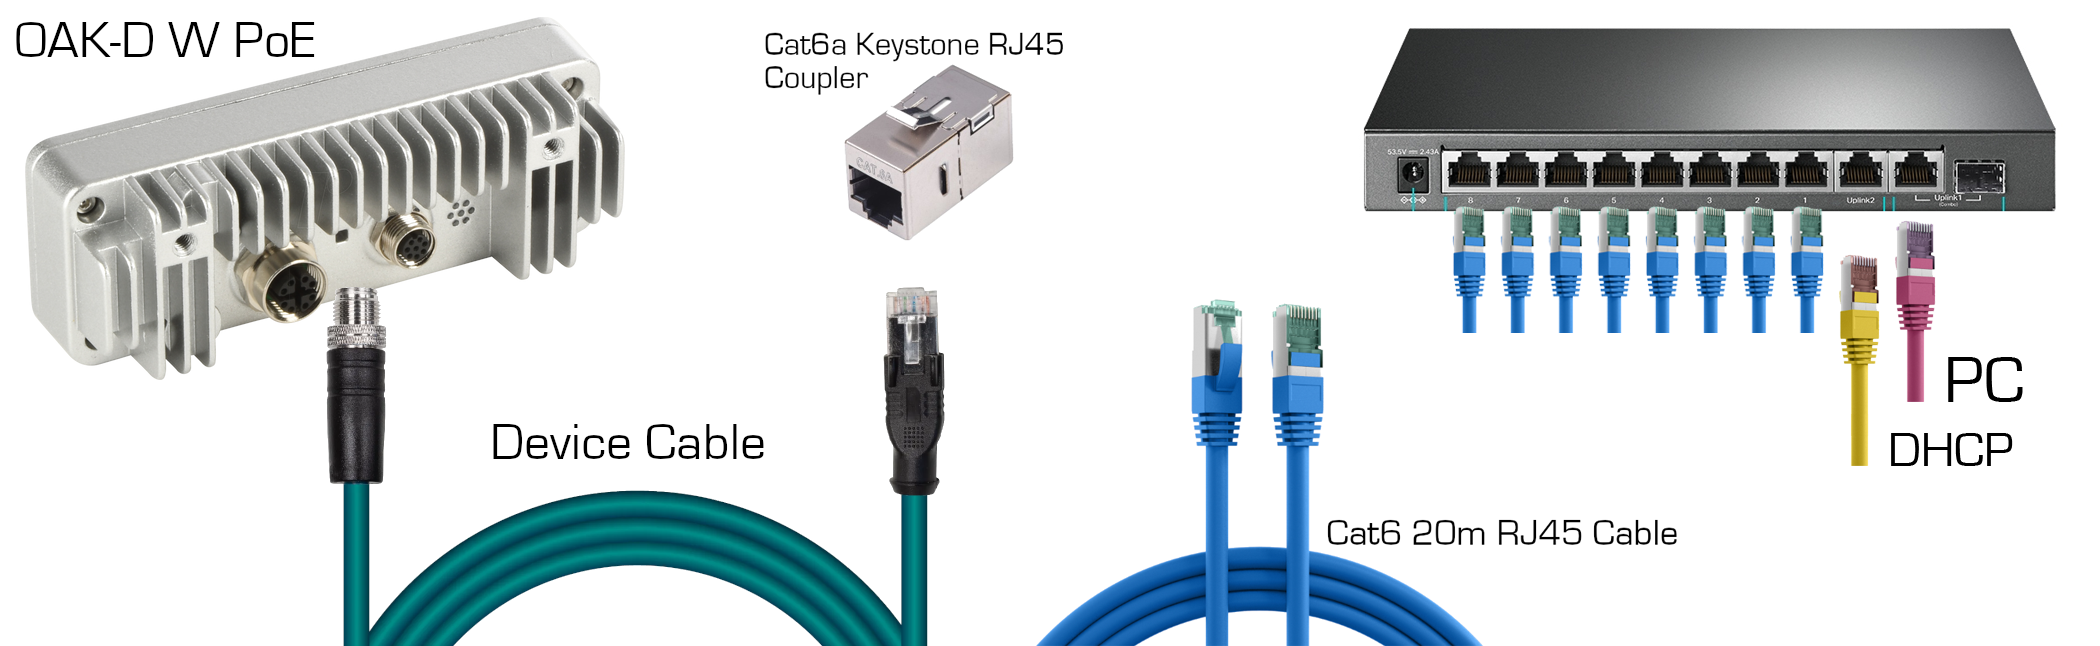
Proper OAK-D W PoE camera connection with the required parts and the switch.
PC minimum recommended specifications
Before installing Moverse Capture, ensure your system meets the following minimum requirements:- Operating System: Windows 11
- Processor: Intel i7 12th gen or higher
- RAM: 32GB minimum
- Hard Drive: 10GB of free space
🔥 Graphics Card
Currently, we exclusively support NVIDIA Graphics Cards. To provide maximum flexibility across various PC configurations, we offer several AI Capability Levels. The table below outlines the mapping between hardware tiers and supported features, assuming a standard configuration of 8 cameras and the default AI Capability (Level 2). For different configuratios, please contact us.AI Capability Level Scaling:
- Lower Levels: Prioritize performance, allowing for more actors to be tracked simultaneously.
- Higher Levels: Prioritize tracking accuracy and skeletal fidelity at the cost of higher GPU compute requirements.
¹ Hand Tracking: Supports real-time wrist articulation and enables finger tracking via cloud-based reprocessing.
Installation
- Access the Installer: Contact us to secure access to the latest version of Moverse.
- Run the Installer: Double-click the downloaded file and follow the on-screen instructions to install.
Initial Setup
- Run Moverse Hub: Find the shortcut on your desktop or in your applications folder.
- Access Your Workspace: Login with your credentials to access your workspace.
- Open Your First Capturing Session: After login, at the “Capture” page, select the type of capturing you wish to initiate (Markerless or Marker-based) and click the Capture Card.
Tips and Tricks
- Research: Explore Moverse technology behind the scenes. You can access the relevant scientific publications here.
- Community Forums: Join our community forums at Moverse Discord to learn tips from other users and share your work.