Step 1: Access MoCap Options Tab
- After logging in, the MoCap options tab will automatically appear, showing you the range of features and tools available under your subscription.
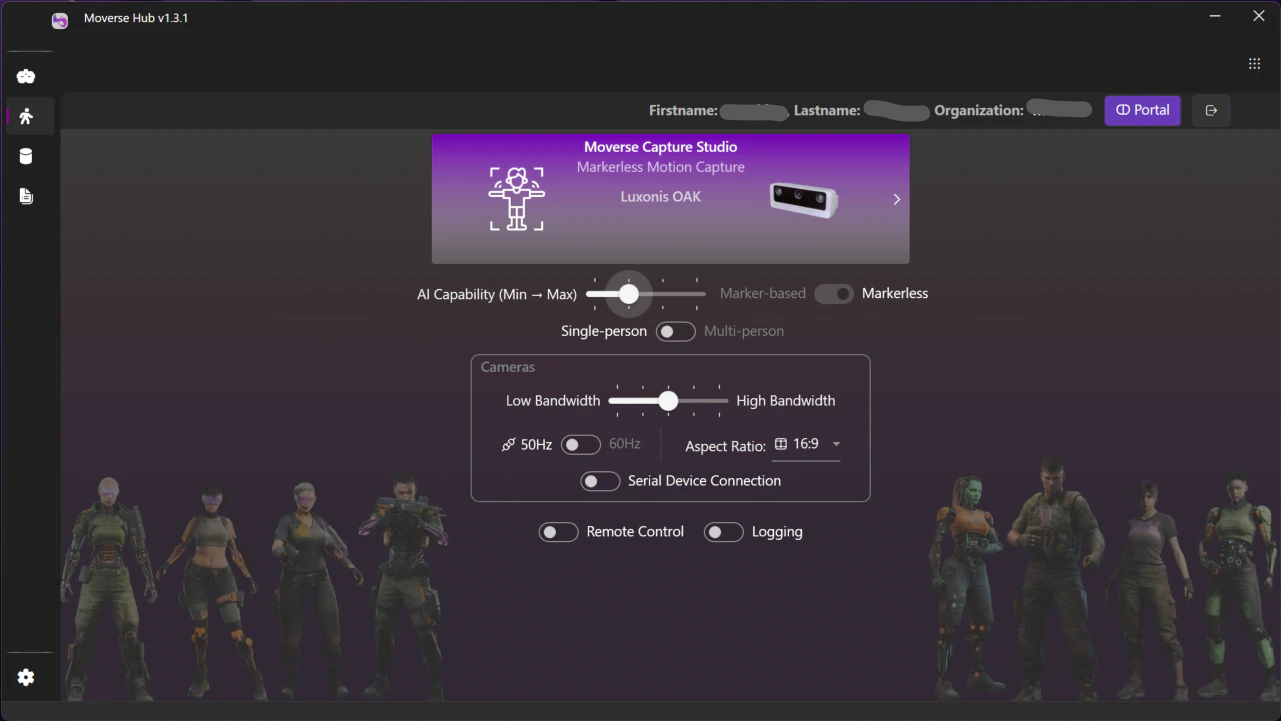
Step 2: Set AI Capability Level
- Adjust AI Capability: Select the AI capability level that matches your hardware and performance needs.
- Minimum: Uses light AI models, requiring fewer system resources. Recommended for lower-end hardware or when running multiple applications.
- Maximum: Uses strong AI models, providing the highest accuracy and performance, but requires more powerful hardware and higher resource allocation.
- Intermediate Levels: Balance between resource usage and AI performance, suitable for most standard setups.
Step 3: Select Capturing Mode
- Choose Capturing Mode: From the options displayed, select the capturing mode that suits your project needs, Markerless or Marker-based.
Note: The Marker-based mode is a legacy feature and is no longer actively maintained. We recommend using Markerless for the best experience.
Step 4: Select between Single- and Multi-person Capturing Option
- Choose Capturing Option: Select the capturing mode that suits your project needs, single-person or multi-person.
- MAX Plan Feature: If you are on the MAX plan, a dropdown menu will appear allowing you to specifically select the exact number of actors you wish to capture.
Step 5: Set Bandwidth Level
- Adjust Bandwidth: Select a suitable bandwidth level based on your network capacity.
- Lower levels are recommended when your network cannot handle high data throughput.
- Higher levels can be selected when there is sufficient bandwidth to support better data quality.
Step 6: Set Powerline Frequency
- Select Frequency: Choose between 50Hz and 60Hz depending on your region’s power grid. Correctly setting this helps prevent flickering issues from artificial lighting in your camera feed.
Step 7: Set Camera Aspect Ratio
- Select Aspect Ratio: Choose the aspect ratio that best fits your camera hardware or project requirements. Available options are:
- 16:9
- 4:3
- 16:10
Step 8: Serial Device Connection
- Connection Type: You can choose to connect devices serially instead of the default parallel connection.
- Usage: While serial connection is slower, it is sometimes required for specific hardware settings or to resolve stability issues with certain devices.
Step 9: Enable Remote Control
- Remote Control: Toggle this option to allow external applications to control the studio.
- Usage: This is only necessary when you are integrating Moverse with other software pipelines or automation tools.
Step 10: Enable Logging
- Turn on Logging: Toggle this setting to enable verbose logging. This provides deeper debugging information.
- This is highly recommended when troubleshooting complex setups or working with the Moverse Support team to diagnose issues.
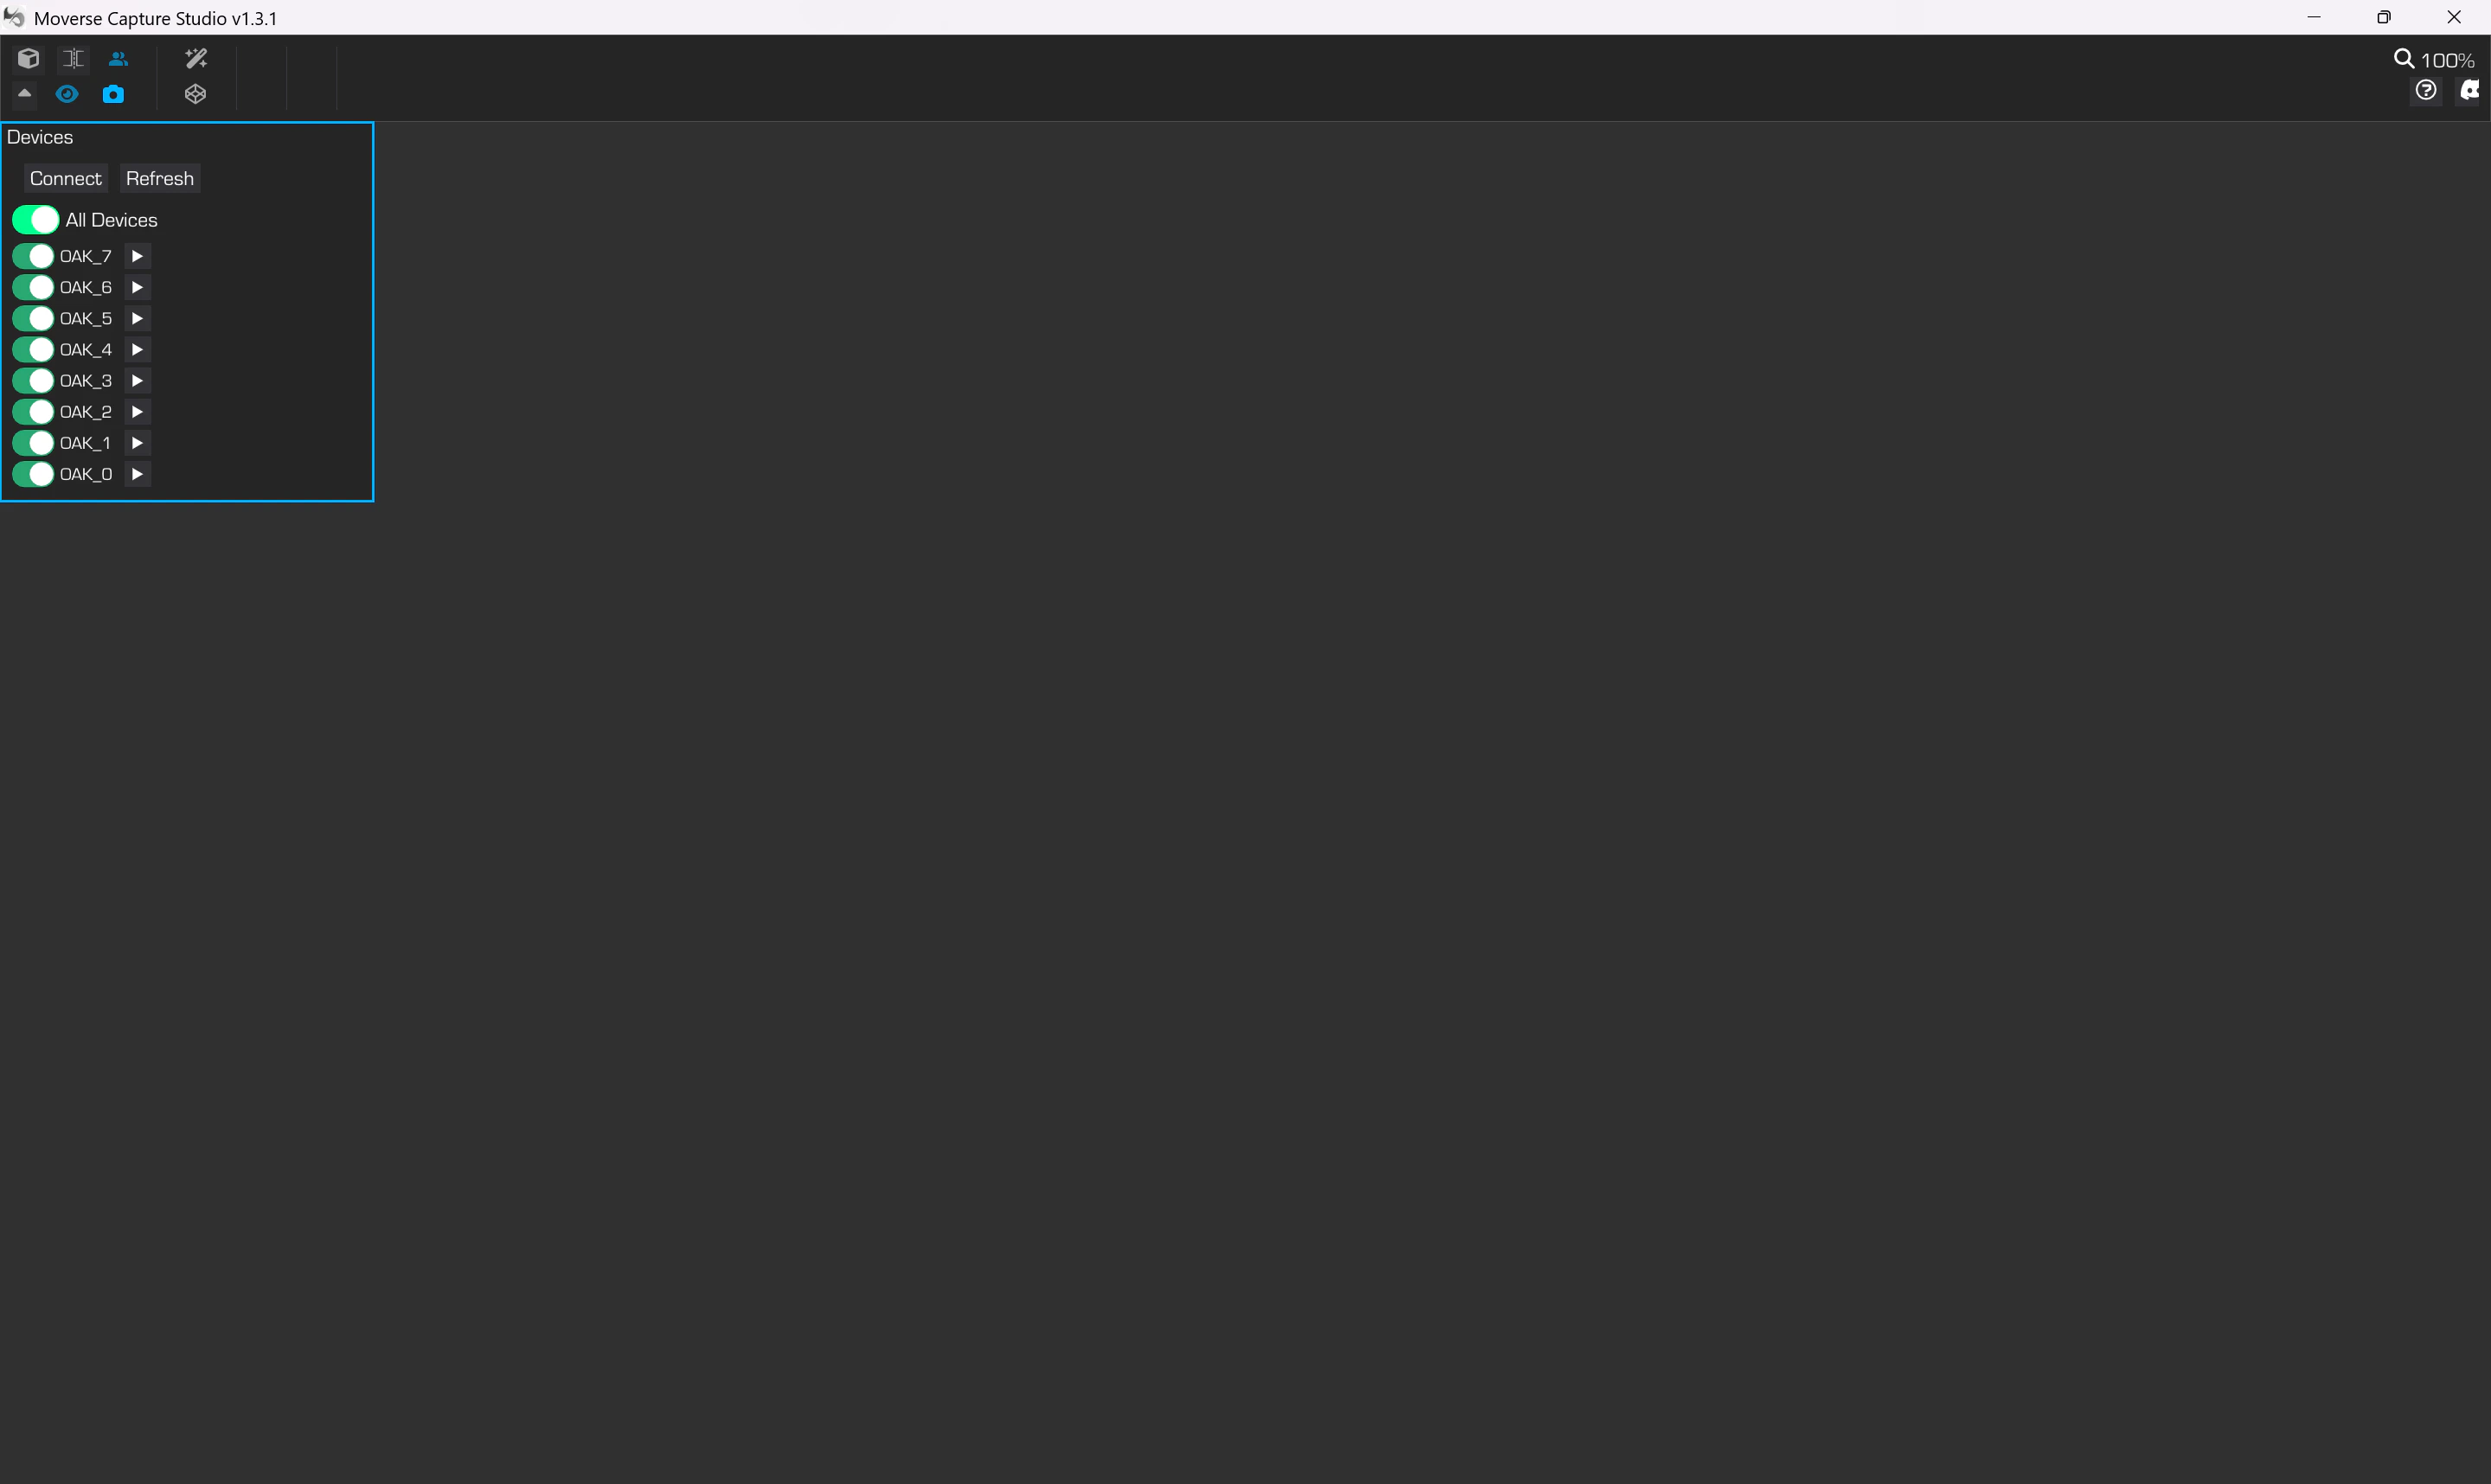
Step 11: Open Studio in Selected Mode
- Once you have made your selections, click on the button to open the studio in the chosen mode.
- The studio interface will launch and should remain active for as long as you need to use it.
Step 12: Studio and Hub Dependency
- Be aware that if the Moverse Hub is closed, the studio will also close automatically. Ensure that the hub remains open to avoid interrupting your session.