Moverse Studio allows you to record the performances of actors, capturing their motions for analysis or future reference. The recording controls are located at the bottom of the studio interface. Here are the steps to use this feature:

Step 1: Start Recording

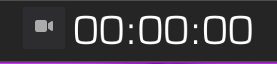
  • Locate the recording UI panel at the main bar of the studio interface.

    The recording UI panel

  • Press the Recording button to start capturing the actor’s performance. A stopwatch will appear, indicating that recording is in progress.

    Start/stop recording button

Step 2: Stop Recording

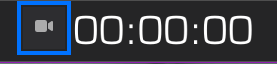
  • To stop recording, press the Recording button again. If you have set a duration for the capture, the recording will stop automatically when the timer ends.

Step 3: Filename and Metadata

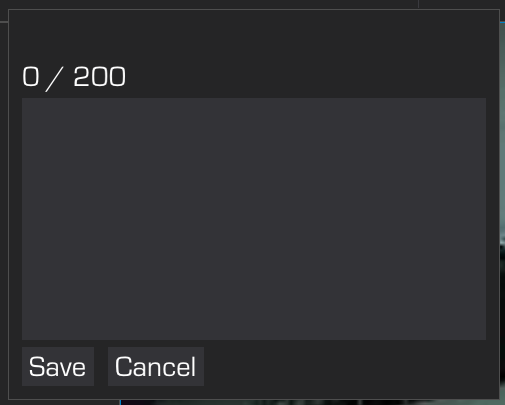
  • After stopping the recording, an additional UI container will appear. Here, you can name the recording and fill in metadata for the actor, such as the age, height, or weight.

    Save a recording by giving a filename and, optionally, respective metadata

Step 4: Save or Cancel

  • Once you have completed the fields, press Save to store the recording.

    Save recording button

  • If you decide not to keep the recording, press Cancel to discard it.

Conclusion

Using these steps, you can efficiently record, label, and manage actor performances within Moverse Studio. This functionality is essential for tracking progress, rehearsals, or creating a library of motion captures.