

1
Manage Captures
-
Browse Captures: Upon accessing the Captures page, you’ll see all your available animations as tiles.
Use the Filters panel on the left to narrow down your captures:
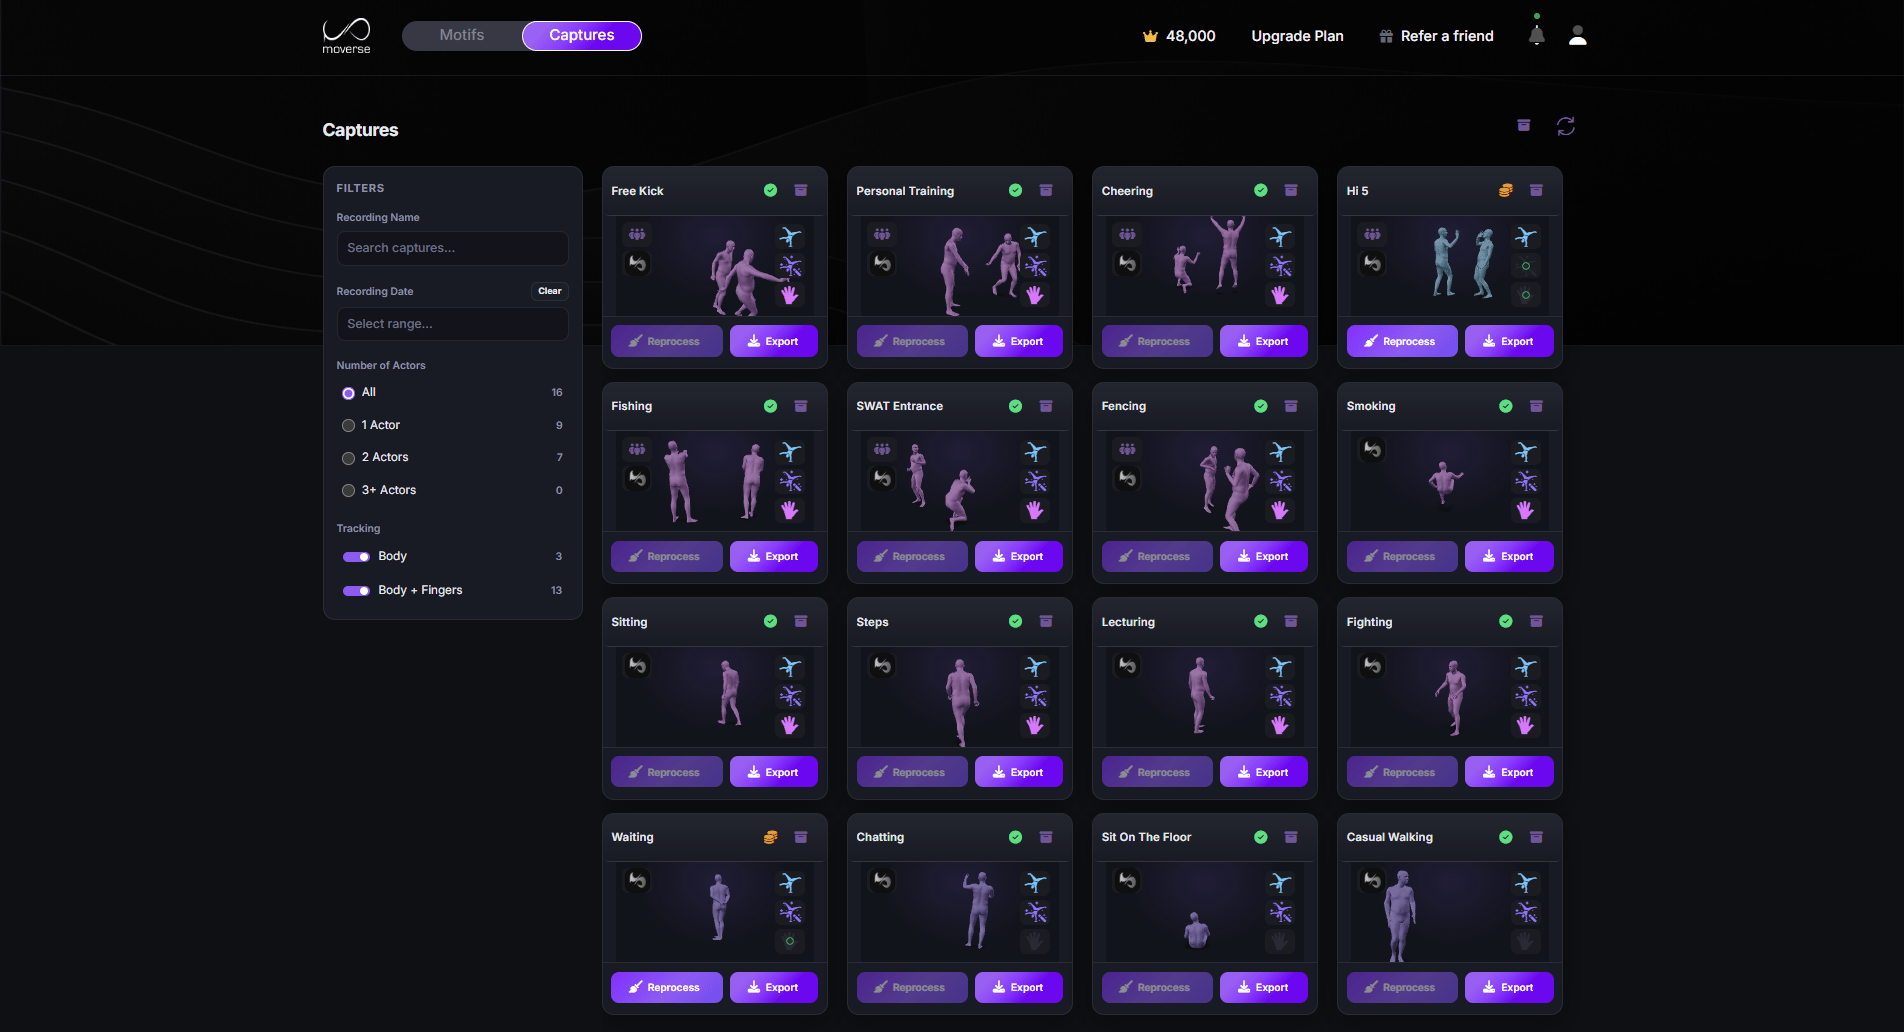
Captures page
- Recording Name — Search by name to quickly locate a specific capture.
- Recording Date — Filter by a date range to find captures from a specific period.
- Number of Actors — Filter by the number of actors in the capture: All, 1 Actor, 2 Actors, or 3+ Actors.
- Tracking — Filter by tracking type: Body (body-only captures) or Body + Fingers (captures with finger tracking).
- Export Animations: Click Export on any capture tile to export it in various formats (FBX, GLB, TRC) and rigs. For more, see Export Manager.
-
Archive / Unarchive: Use the “Archive / Unarchive” button in the top-right corner of each animation tile to organize your workspace by hiding or restoring specific captures.
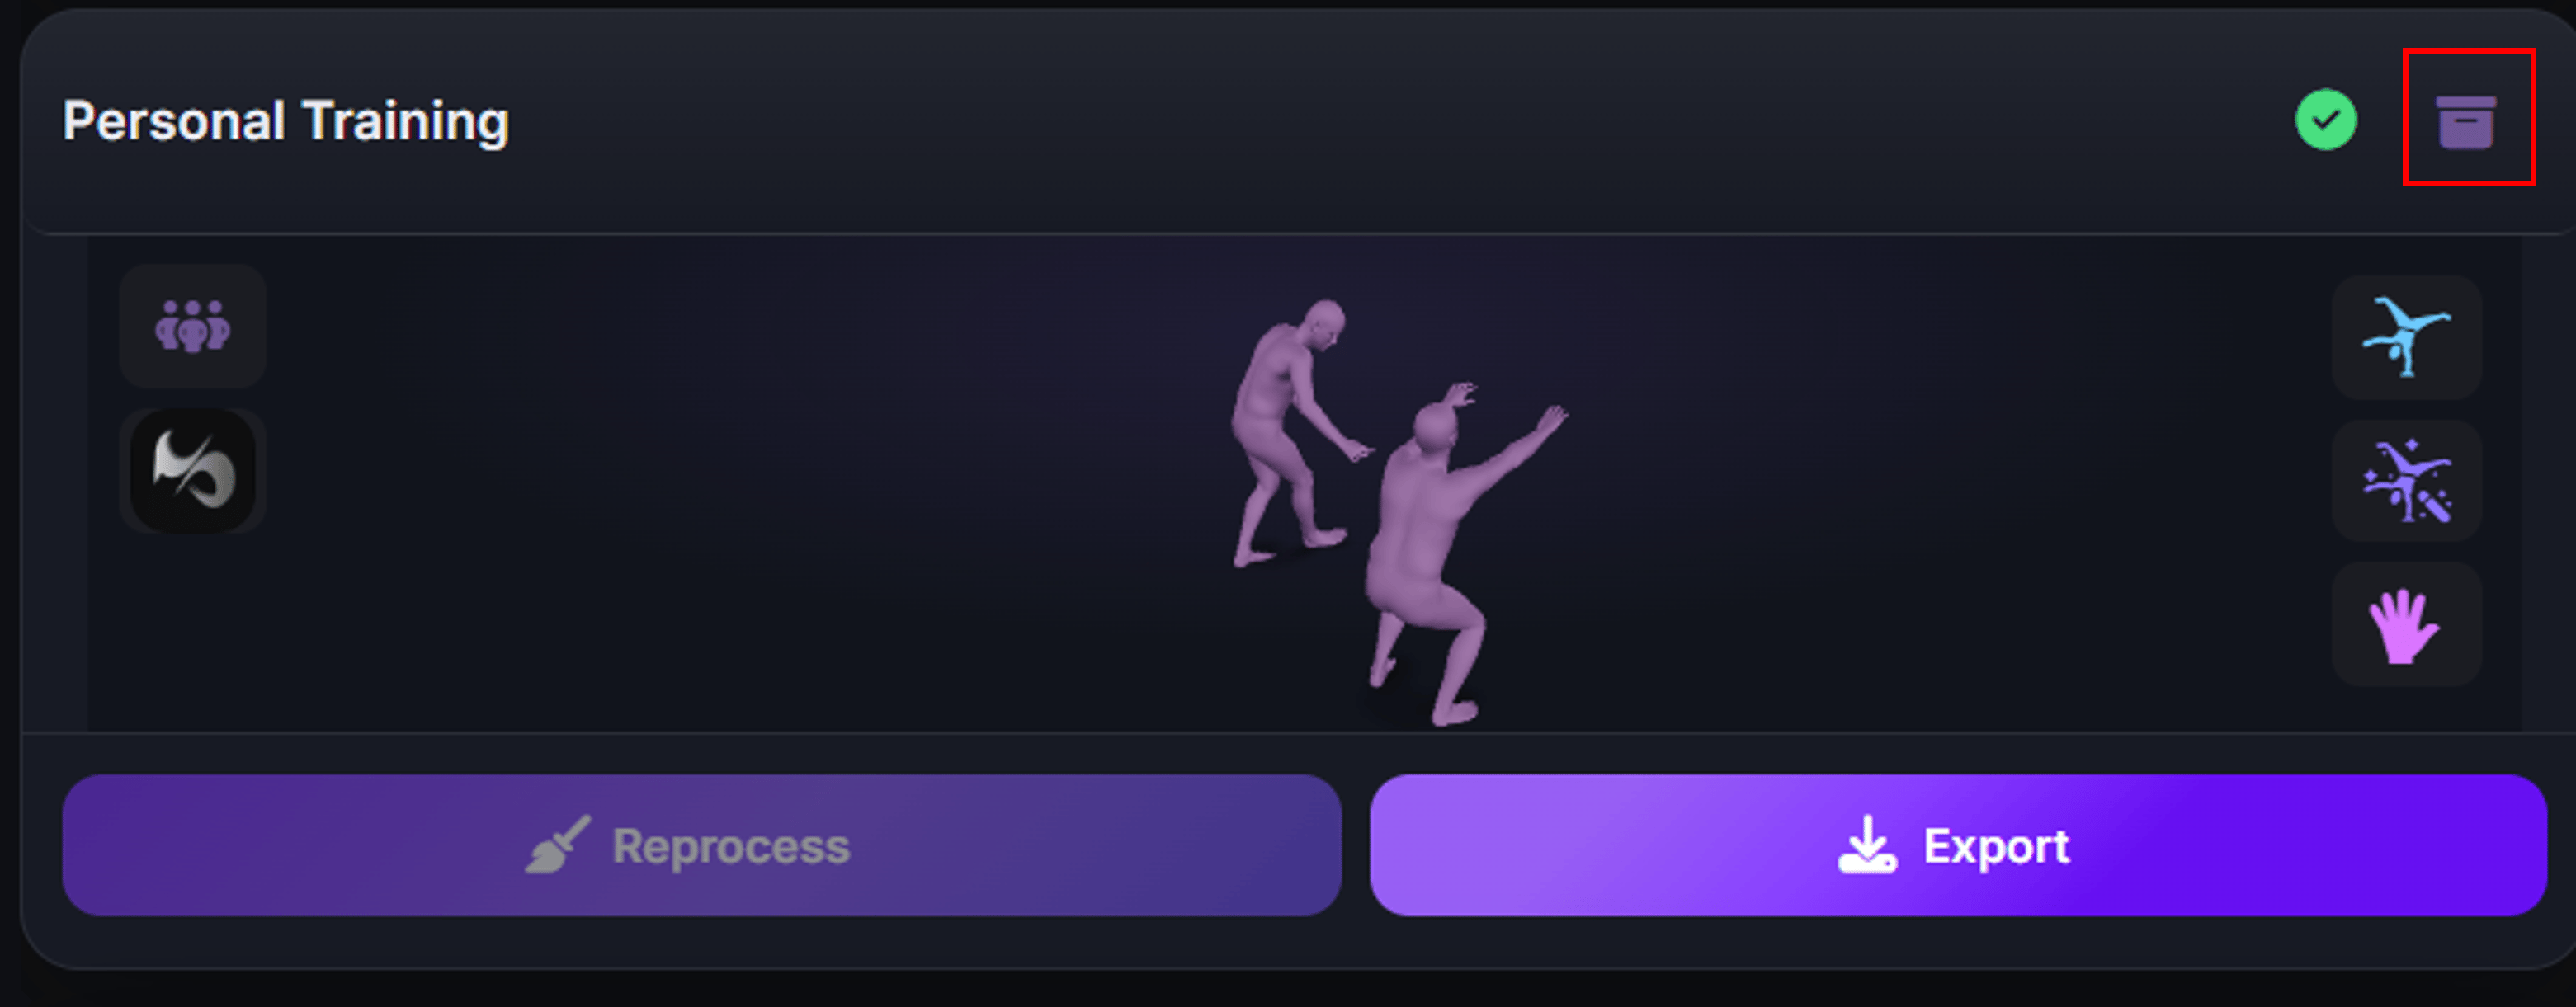
Archive / Unarchive button
2
Online Viewer
-
Preview Captures: Click on a capture tile to open it in the online 3D viewer. The viewer lets you inspect the animation in detail before deciding to export or reprocess it.
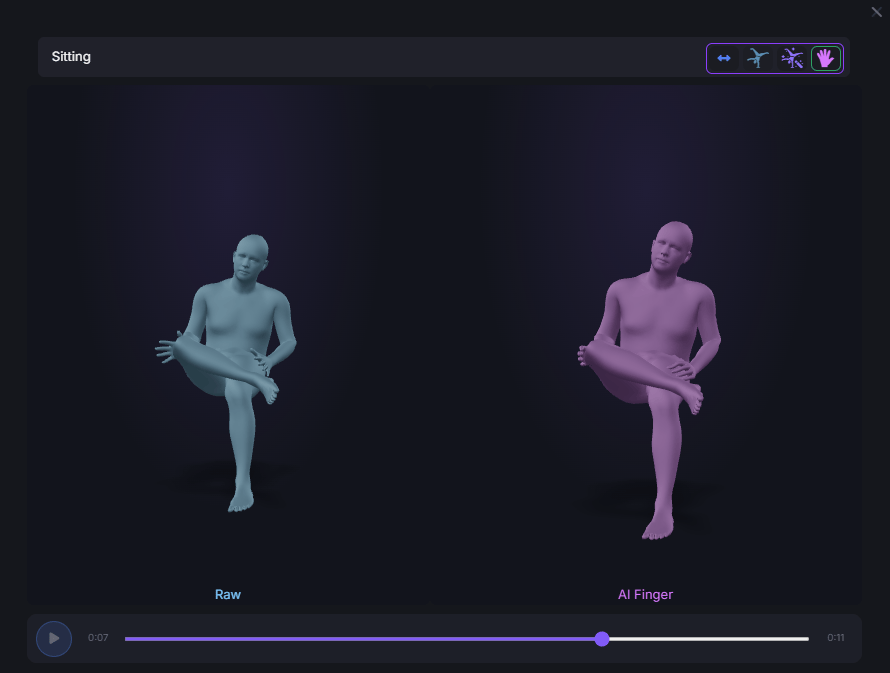
Online 3D viewer
- Compare Versions: Use the button in the top-right toolbar to enable side-by-side comparison mode. Both versions play in sync so you can directly assess differences. The available versions depend on what has been processed for that capture and are labelled beneath each model — for example Raw and AI Finger.
-
Switch View: The remaining toolbar buttons let you isolate a specific version of the animation:
- Raw — the original unprocessed capture.
- AI Reprocess — the AI-enhanced body animation.
- Fingers — the AI finger tracking result.
- Playback Controls: Use the play button and progress bar at the bottom to scrub through the animation at any point in time.