> ## Documentation Index
> Fetch the complete documentation index at: https://docs.moverse.ai/llms.txt
> Use this file to discover all available pages before exploring further.
# Motion Capture
After successful calibration, you are ready to begin the motion capture process in Moverse Studio. The system currently supports capturing for **up to two persons**, and each actor must be initialized **one after the other**. Below are the steps to follow.
***
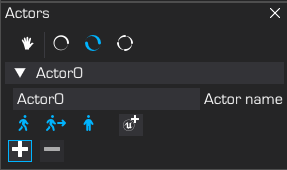
## Actor 1: Initialization and Capture
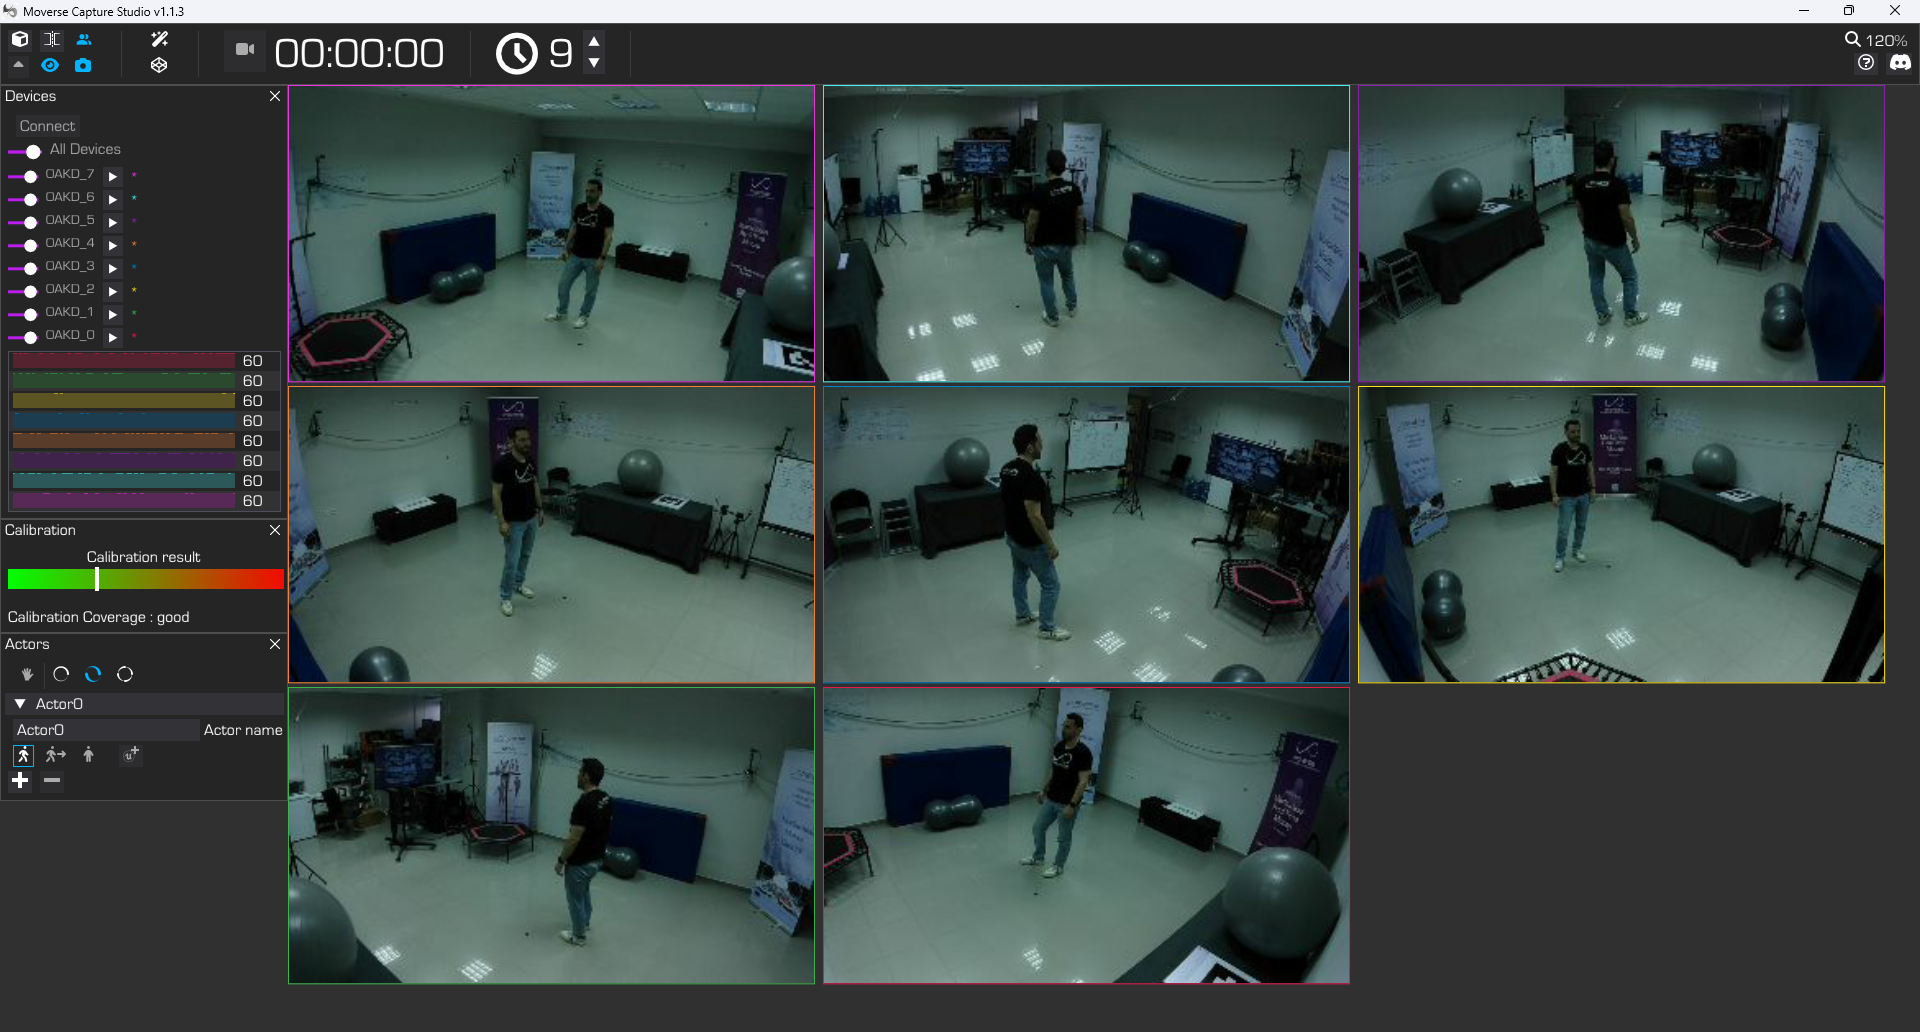
### Step 1: Actor 1 Enters Capturing Space
* Have the first actor enter the designated capturing space.
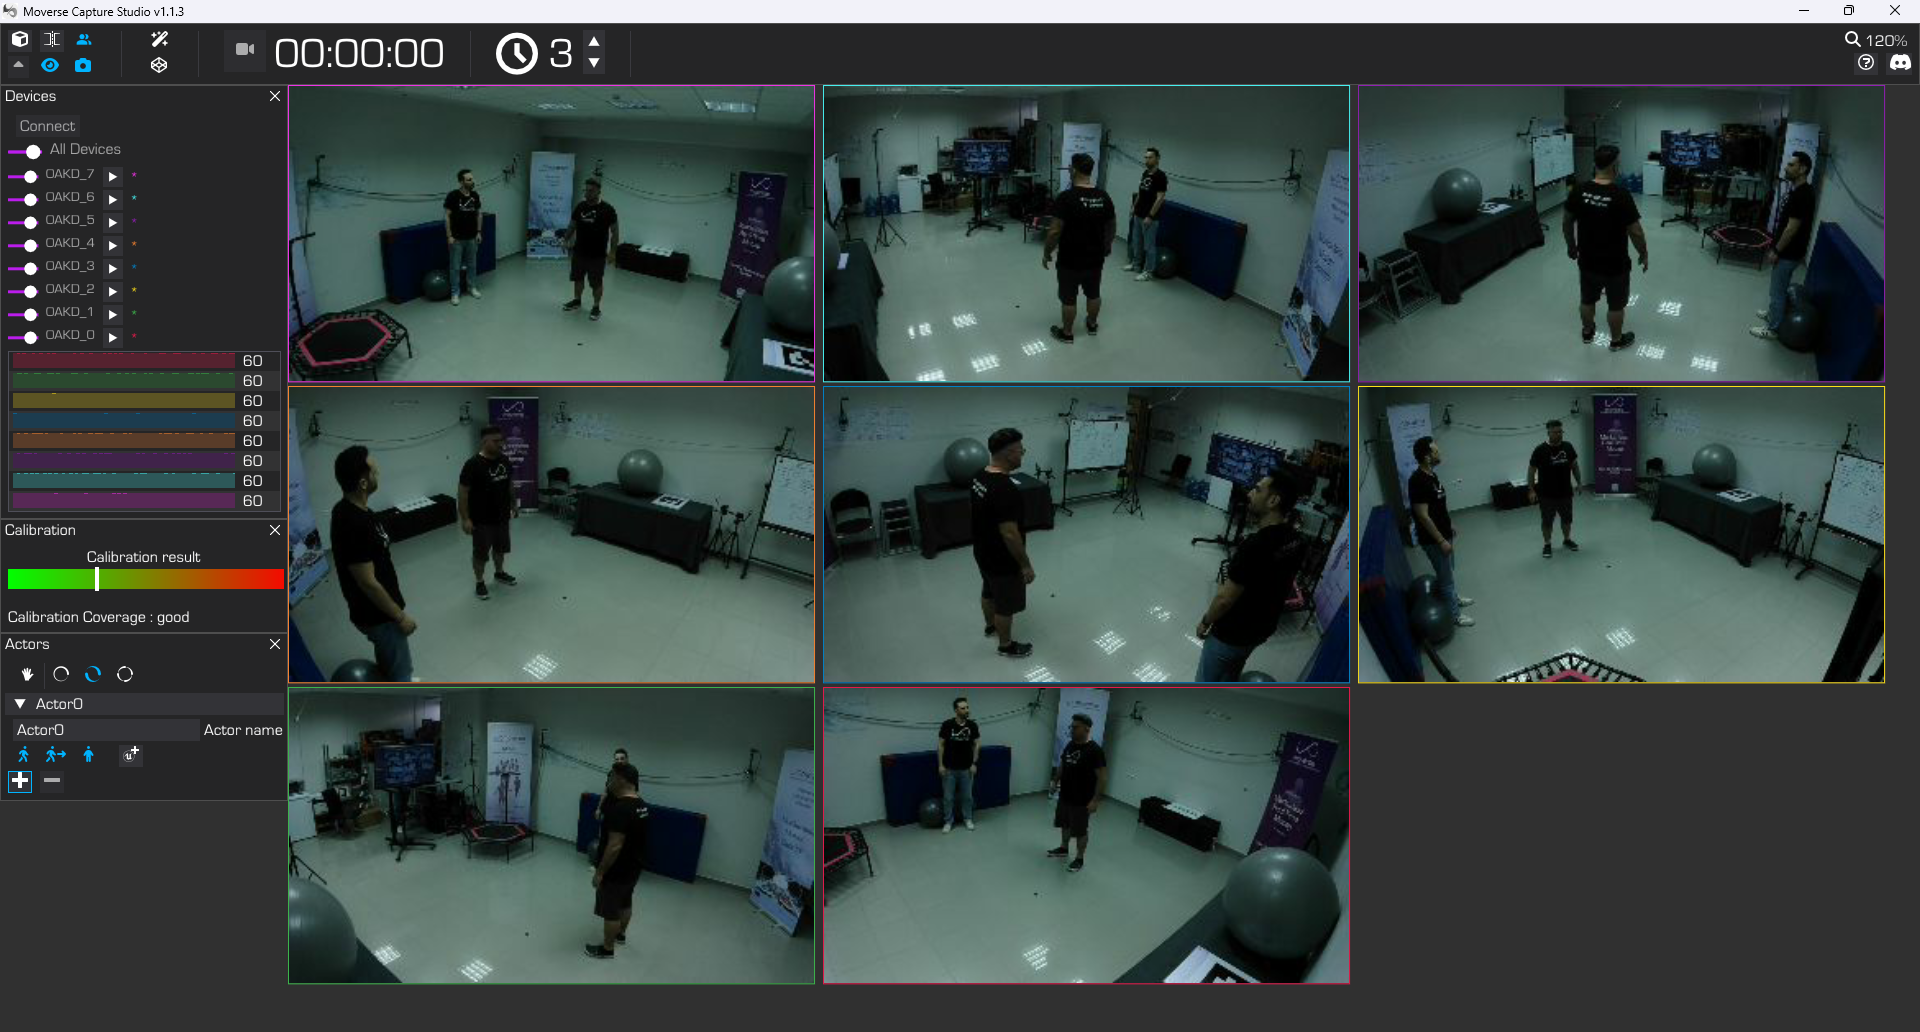
 ### Step 2: Start Capture
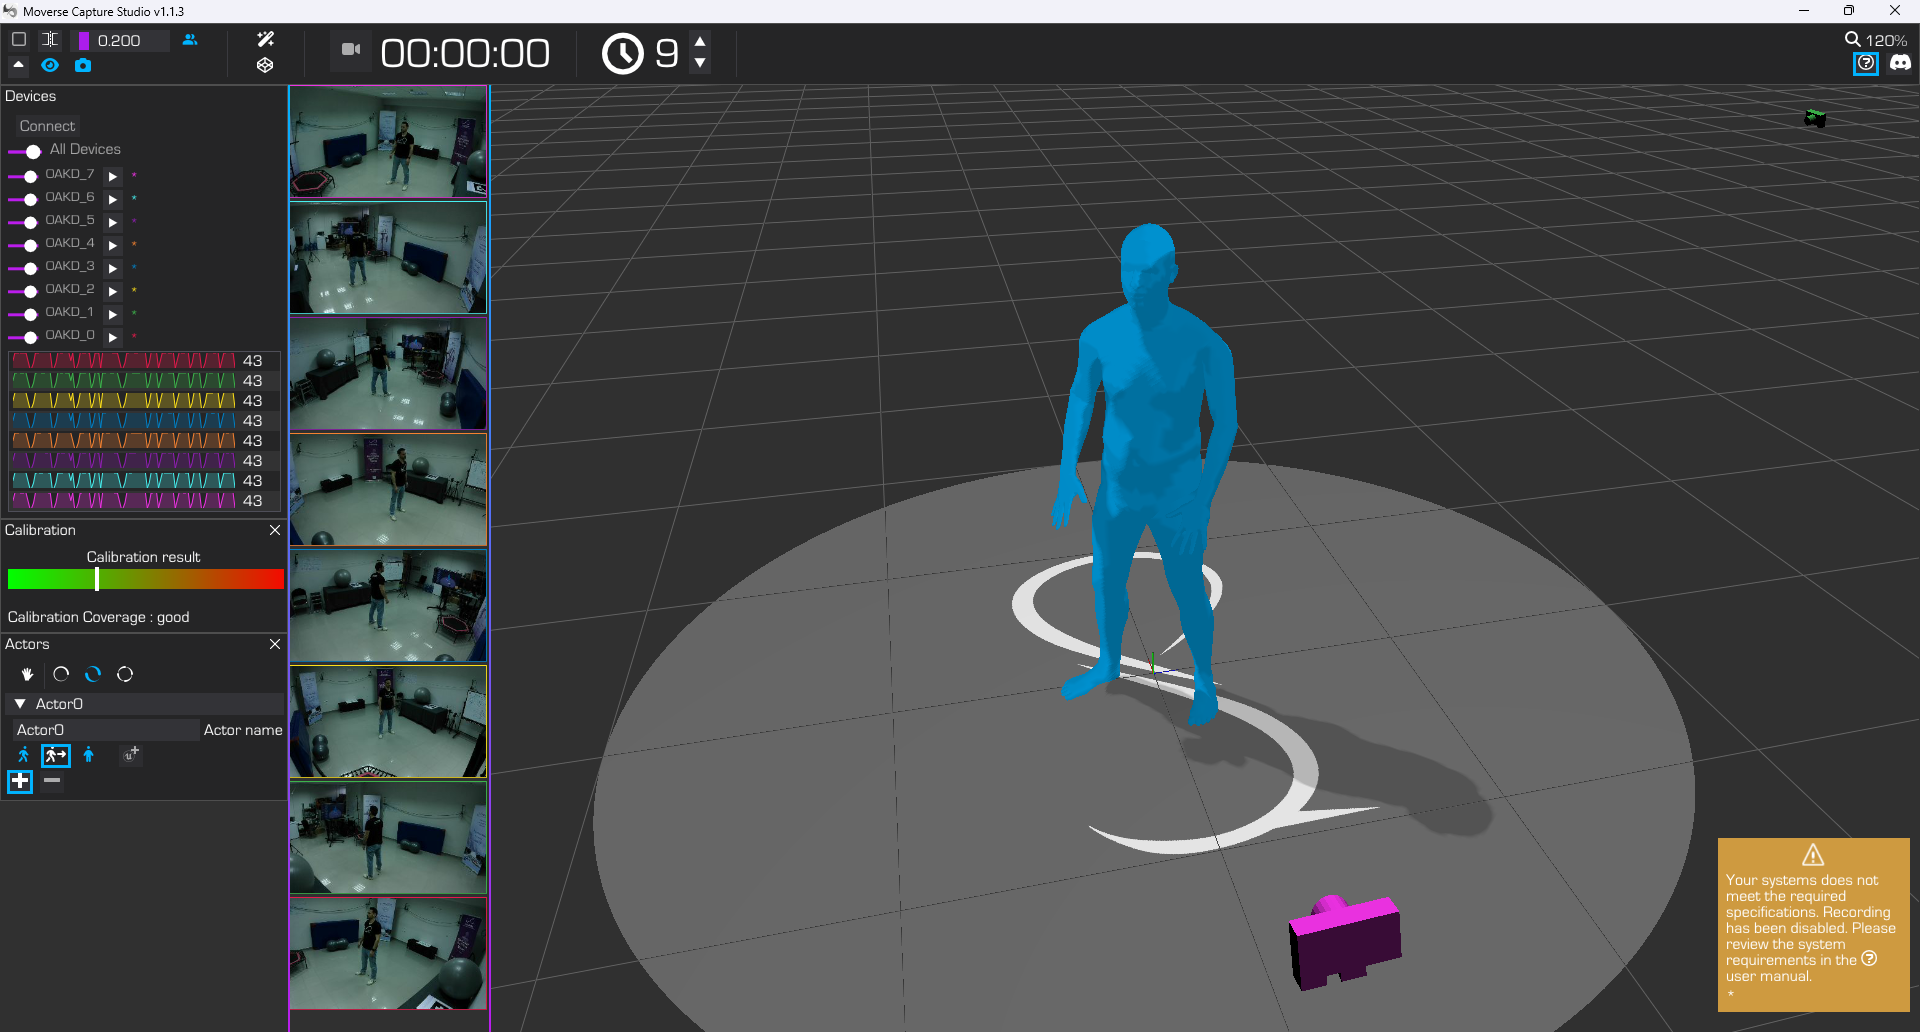
* Press the **Body Calibration** button .
* The user's body will instantly appear in the 3D viewer.
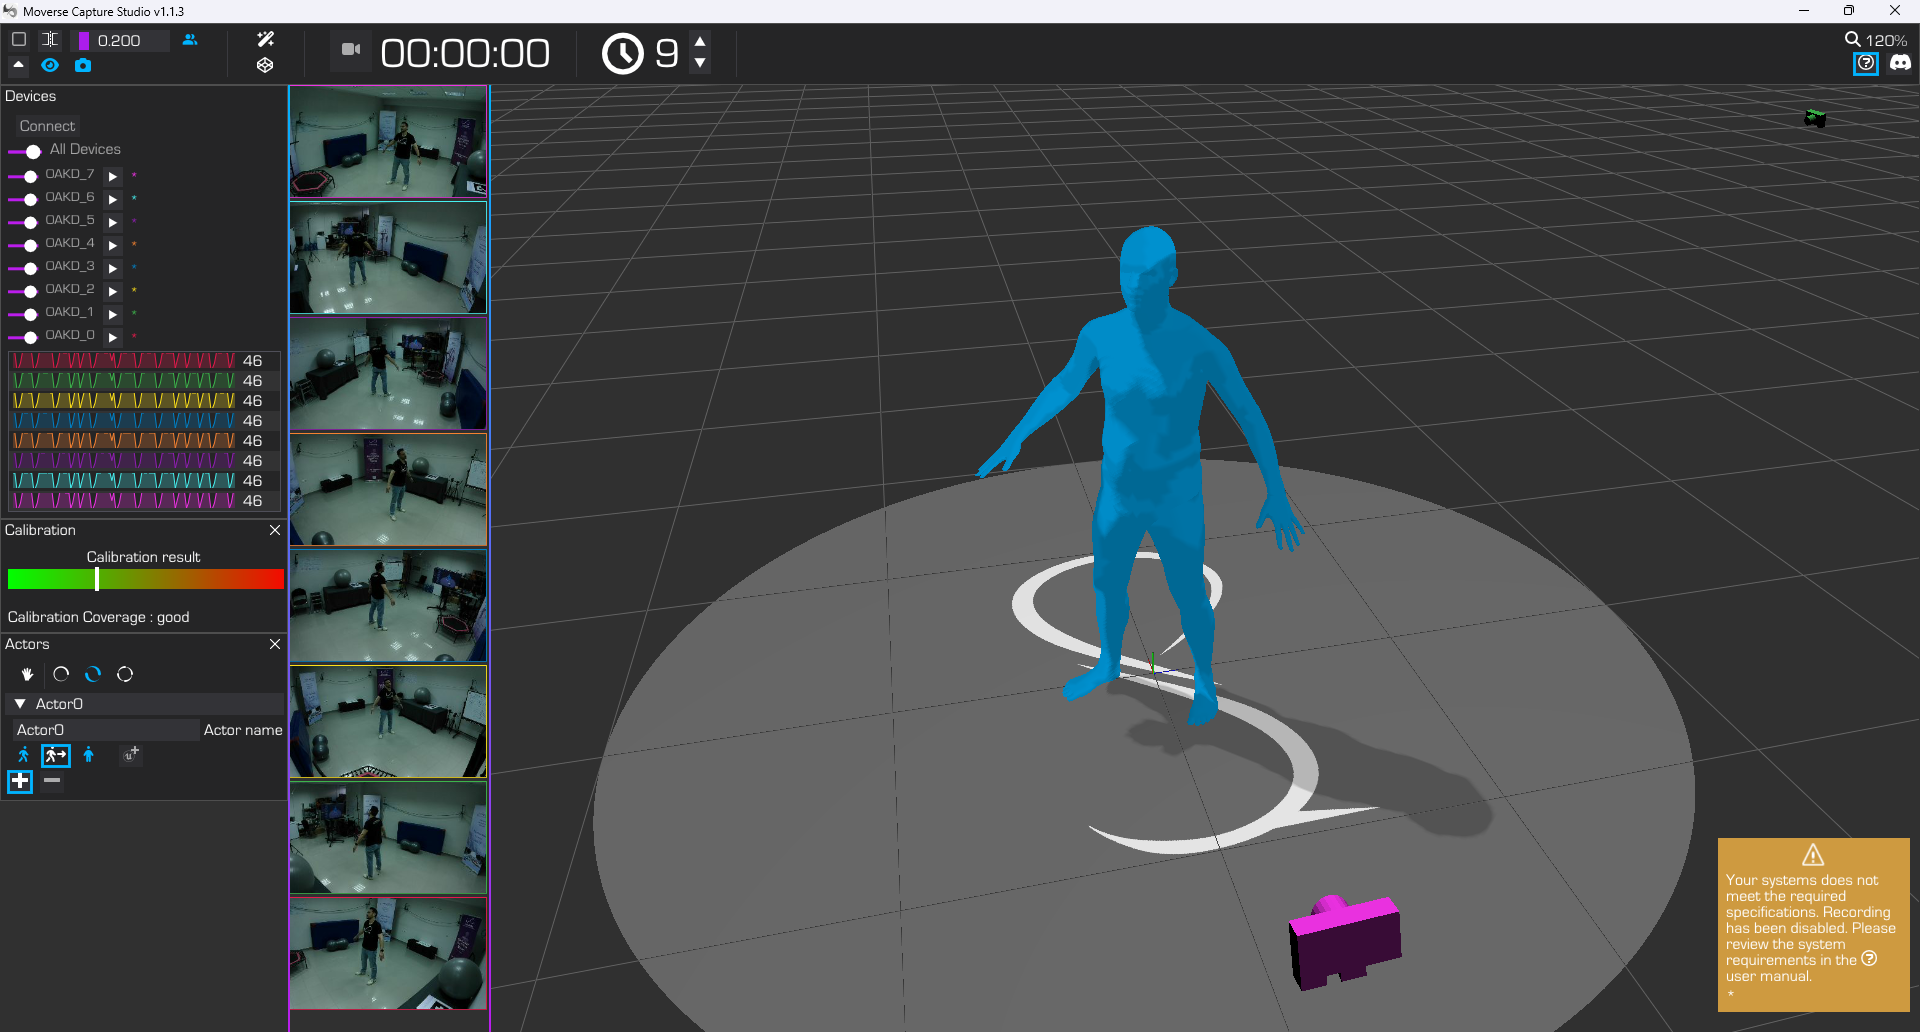
* After the 3D body becomes visible, the actor must walk lightly inside the capturing space for 3-4 seconds.
### Step 2: Start Capture
* Press the **Body Calibration** button .
* The user's body will instantly appear in the 3D viewer.
* After the 3D body becomes visible, the actor must walk lightly inside the capturing space for 3-4 seconds.
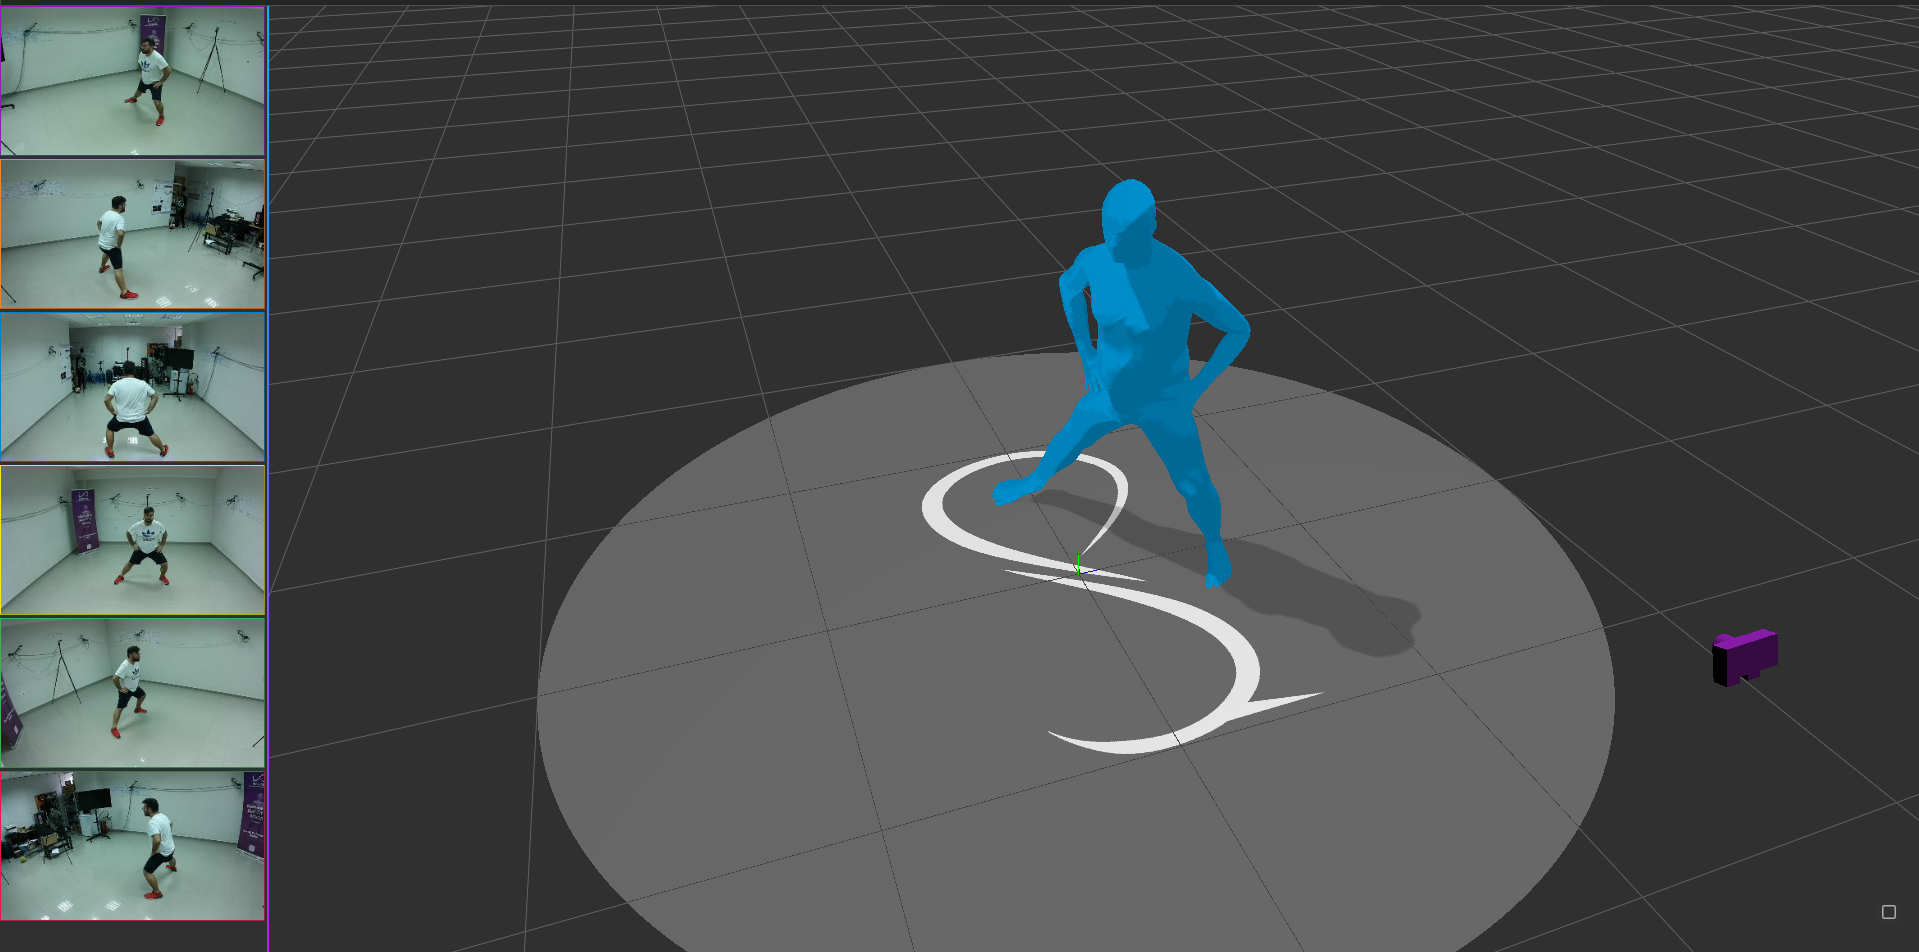
 ### Step 3: Stabilize Capture with a Static Pose
* Have the actor hold a static pose (e.g., an A-pose) to stabilize tracking.
### Step 3: Stabilize Capture with a Static Pose
* Have the actor hold a static pose (e.g., an A-pose) to stabilize tracking.
 * Press the **Motion Tracking** button to lock tracking.
If you notice an extended time period with FPS drops after this step, the body calibration process must be repeated (Step 2).
### Step 4: Continuous Capturing
* The system is now ready to record full-body motion.
* Press the **Motion Tracking** button to lock tracking.
If you notice an extended time period with FPS drops after this step, the body calibration process must be repeated (Step 2).
### Step 4: Continuous Capturing
* The system is now ready to record full-body motion.
 ***
## (Optional) Actor 2: Add a Second Actor
If your project involves a second person, press "+" button and follow these extra steps **after initializing Actor 1**:
***
## (Optional) Actor 2: Add a Second Actor
If your project involves a second person, press "+" button and follow these extra steps **after initializing Actor 1**:
 ### Step 5: Actor 2 Enters Capturing Space
* Invite the second actor into the capturing space. The first actor stays on the side.
### Step 5: Actor 2 Enters Capturing Space
* Invite the second actor into the capturing space. The first actor stays on the side.
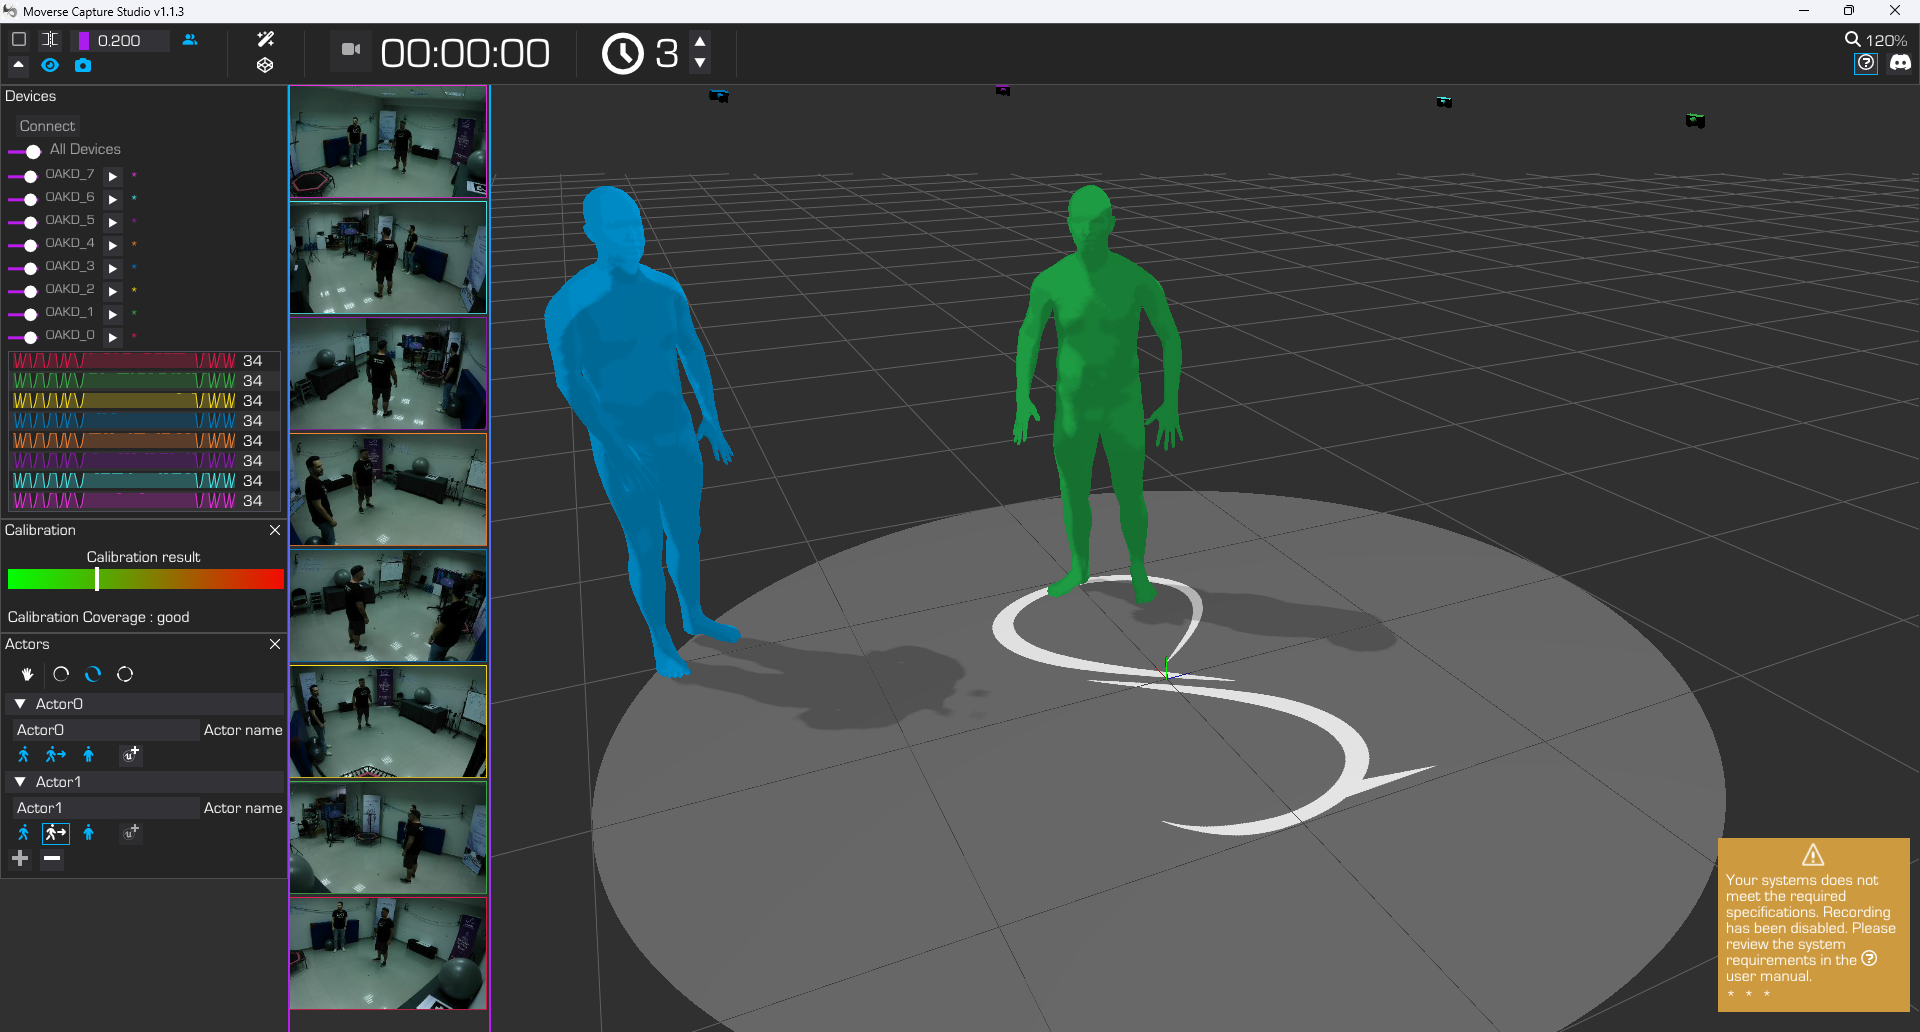
 ### Step 6: Start Capture for Actor 2
* Press the **Body Calibration** button again.
* A second body will now appear in the 3D viewer.
* After the second body becomes visible, the actor must walk lightly inside the capturing space for 3-4 seconds.
### Step 6: Start Capture for Actor 2
* Press the **Body Calibration** button again.
* A second body will now appear in the 3D viewer.
* After the second body becomes visible, the actor must walk lightly inside the capturing space for 3-4 seconds.
 ### Step 7: Stabilize Actor 2 with Static Pose
* Have Actor 2 stand in a static pose.
* Press the **Motion Tracking** button again to initialize tracking for the second actor.
### Step 7: Stabilize Actor 2 with Static Pose
* Have Actor 2 stand in a static pose.
* Press the **Motion Tracking** button again to initialize tracking for the second actor.
 If you notice an extended time period with FPS drops after this step, the body calibration process must be repeated (Step 6).
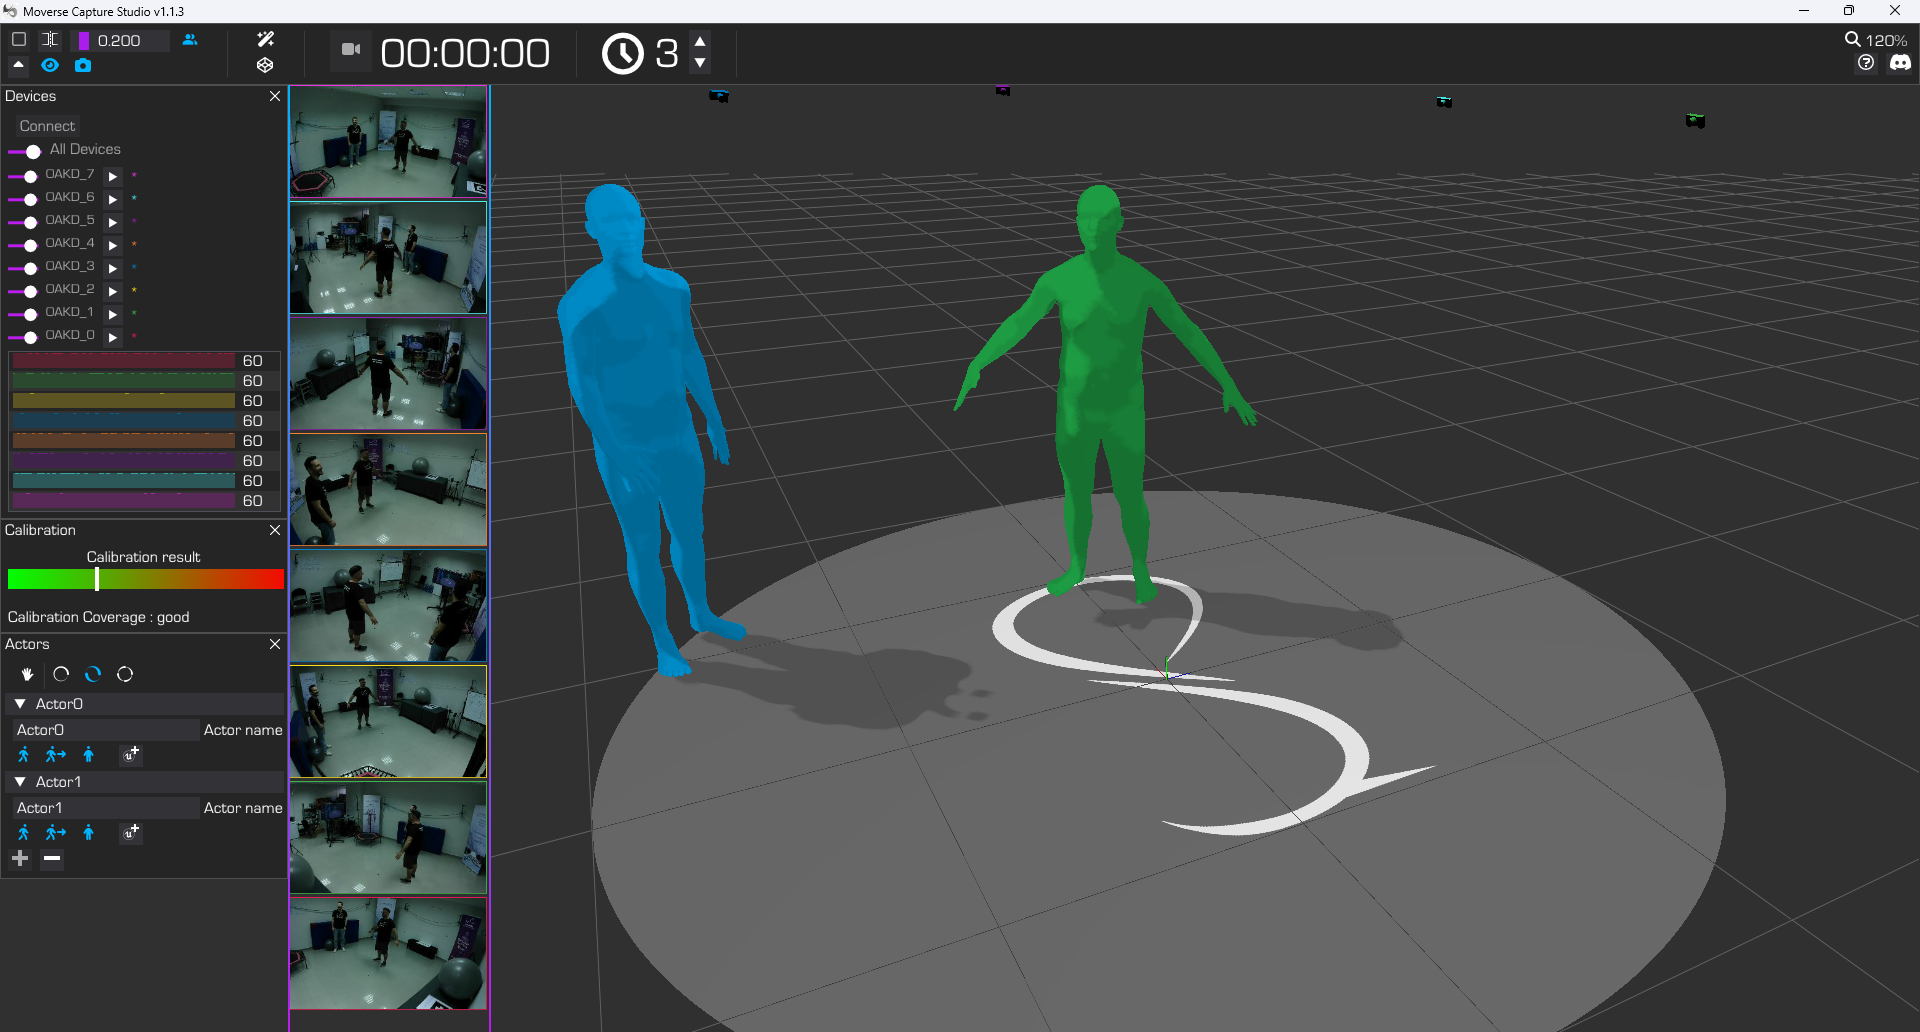
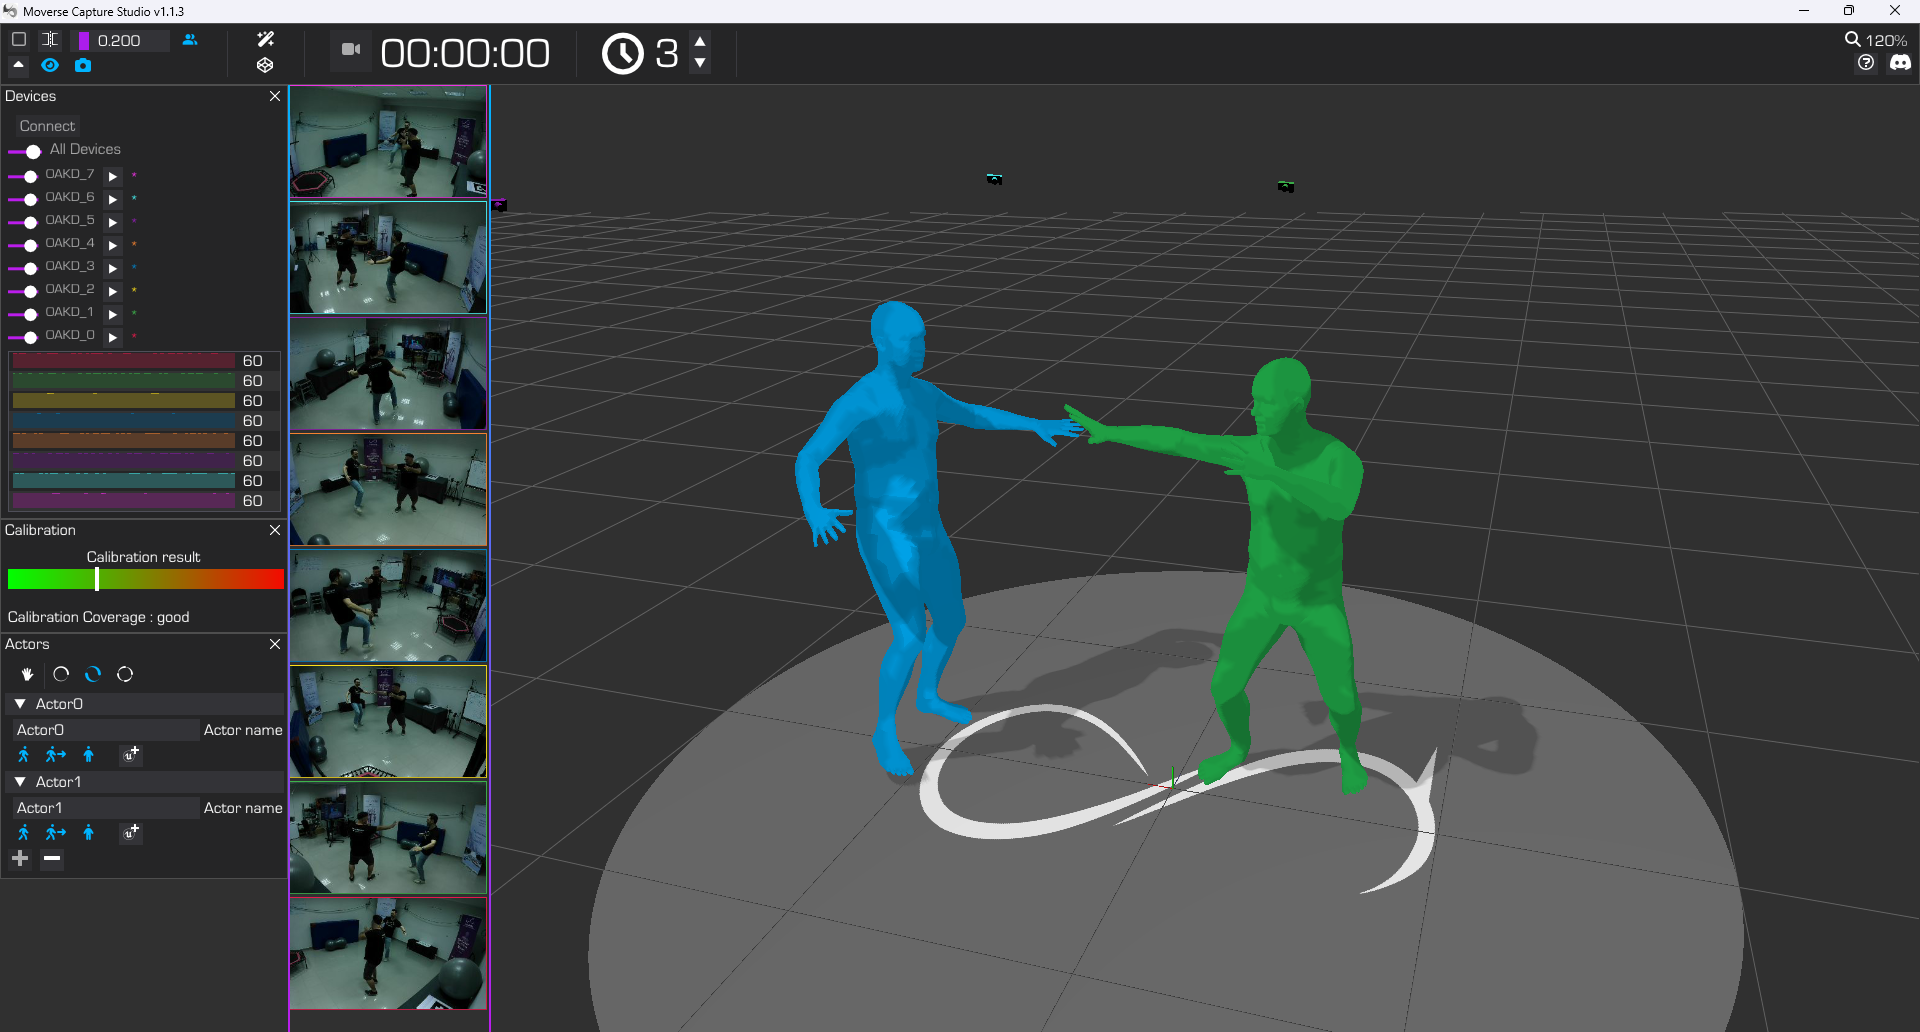
### Step 8: Both Actors Ready for Capture
* With both actors stabilized, you can now capture dual-person motion simultaneously in the same space.
If you notice an extended time period with FPS drops after this step, the body calibration process must be repeated (Step 6).
### Step 8: Both Actors Ready for Capture
* With both actors stabilized, you can now capture dual-person motion simultaneously in the same space.
 ***
### Step 9: Enable Hand Tracking and Finger Re-processing
* **Activate Hand Tracking**: adds real-time hand tracking to the capture.
* **Cloud Re-Processing**: Enabling hand tracking also triggers finger re-processing in the cloud for greater fidelity.
***
### Step 10: Re-Capturing or Switching Actors
* To reinitialize tracking or switch actors:
* Disable **Motion Tracking**.
* Have the new actor enter and assume a static pose.
* Re-enable **Motion Tracking** to restart tracking for the new session.
***
## Conclusion
The process for capturing one or two actors is nearly identical—initialize one actor at a time following the same steps. This sequential setup ensures precise calibration and tracking for both individuals. For questions or assistance, consult the troubleshooting guide or reach out to support.
***
### Step 9: Enable Hand Tracking and Finger Re-processing
* **Activate Hand Tracking**: adds real-time hand tracking to the capture.
* **Cloud Re-Processing**: Enabling hand tracking also triggers finger re-processing in the cloud for greater fidelity.
***
### Step 10: Re-Capturing or Switching Actors
* To reinitialize tracking or switch actors:
* Disable **Motion Tracking**.
* Have the new actor enter and assume a static pose.
* Re-enable **Motion Tracking** to restart tracking for the new session.
***
## Conclusion
The process for capturing one or two actors is nearly identical—initialize one actor at a time following the same steps. This sequential setup ensures precise calibration and tracking for both individuals. For questions or assistance, consult the troubleshooting guide or reach out to support.