> ## Documentation Index
> Fetch the complete documentation index at: https://docs.moverse.ai/llms.txt
> Use this file to discover all available pages before exploring further.
# Calibration
Proper calibration is essential for achieving accurate results in Moverse Studio. The calibration process includes two cascaded steps: camera spatial alignment, and the definition of coordinate system axes and ground.
### Step 1: Camera Spatial Alignment
#### 1.1 Check Streaming
* Ensure that the cameras are streaming and the streams are visible.
#### 1.2 Adjust Camera Placement
* Position the cameras to optimally cover the capturing space.
For circular capturing spaces, arrange the cameras to focus on the center of the circle.
Ensure each camera can fully capture a standing person with equal margins from top to bottom.
For further details regarding the proper system setup, visit the [related section](../quickstart/system_setup).
#### 1.3 Start Multi-camera Calibration
* Click the camera calibration icon located on the top horizontal bar of the studio interface.
#### 1.4 Enter Capturing Space with calibration accessories
* Enter the capturing space with the appropriate calibration accessory.
Use the calibration accessories and instructions [here](../equipment/markerless/accessories/calibration).
#### 1.5 Monitor Calibration Progress
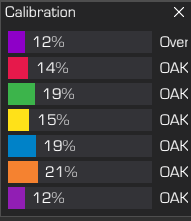
* Observe the calibration progress via the calibration bars displayed for each camera. Each bar fills up as it receives calibration inputs.
#### 1.6 Complete Calibration
* The process is complete when all bars reach 100%.
#### 1.7 Evaluate Calibration Quality
* After the calibration process finishes, assess the precision.
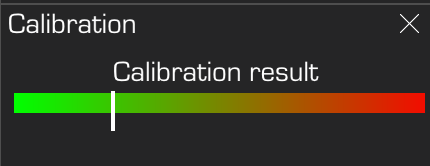
A bar will display the overall quality of the calibration.
The closer to the green side the better.
In case you feel not satisfied with the quality, please redo the process.
{/* - Decide whether to accept the calibration based on the indicated quality. If the quality is insufficient, adjustments may be needed to improve the calibration. */}
### Step 2: Setting the Coordinate System Origin
#### 2.1 Place The Calibration Accessory
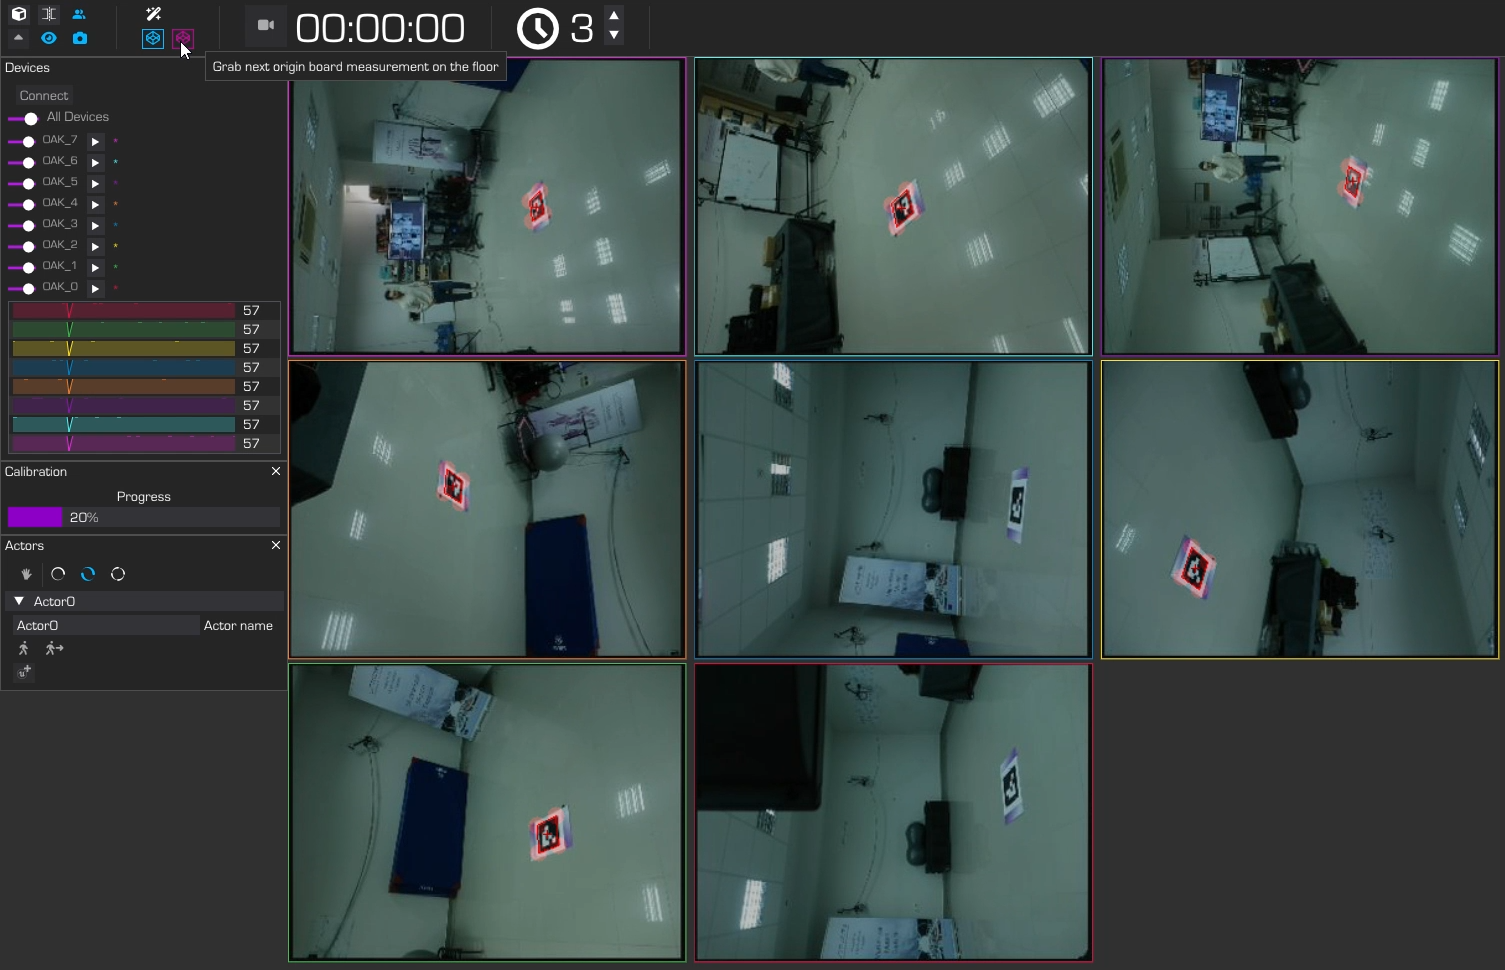
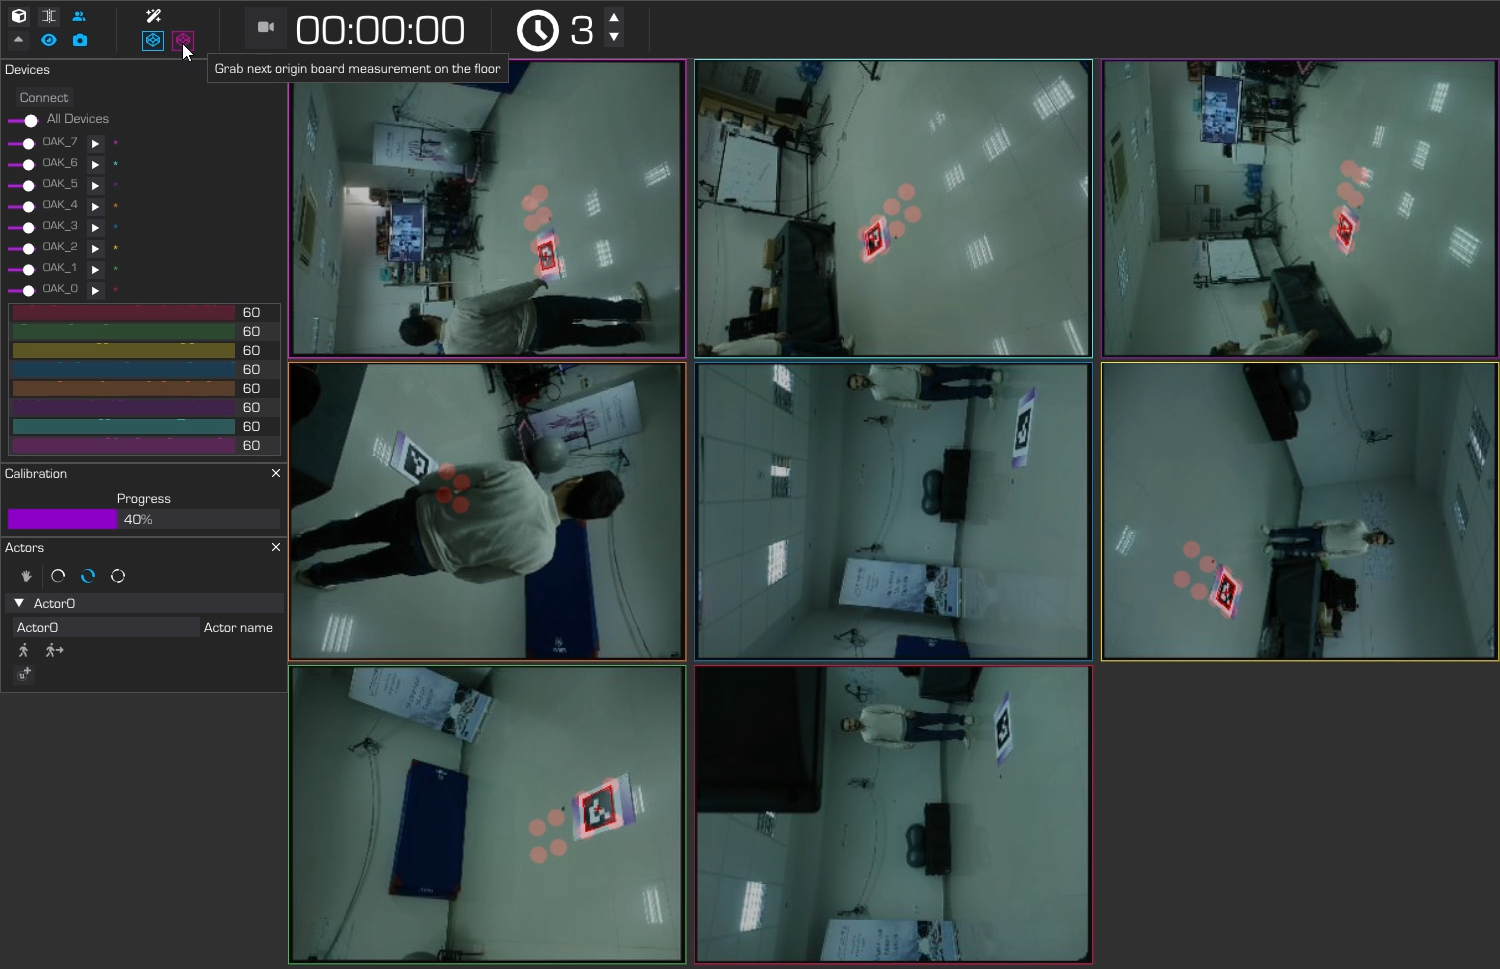
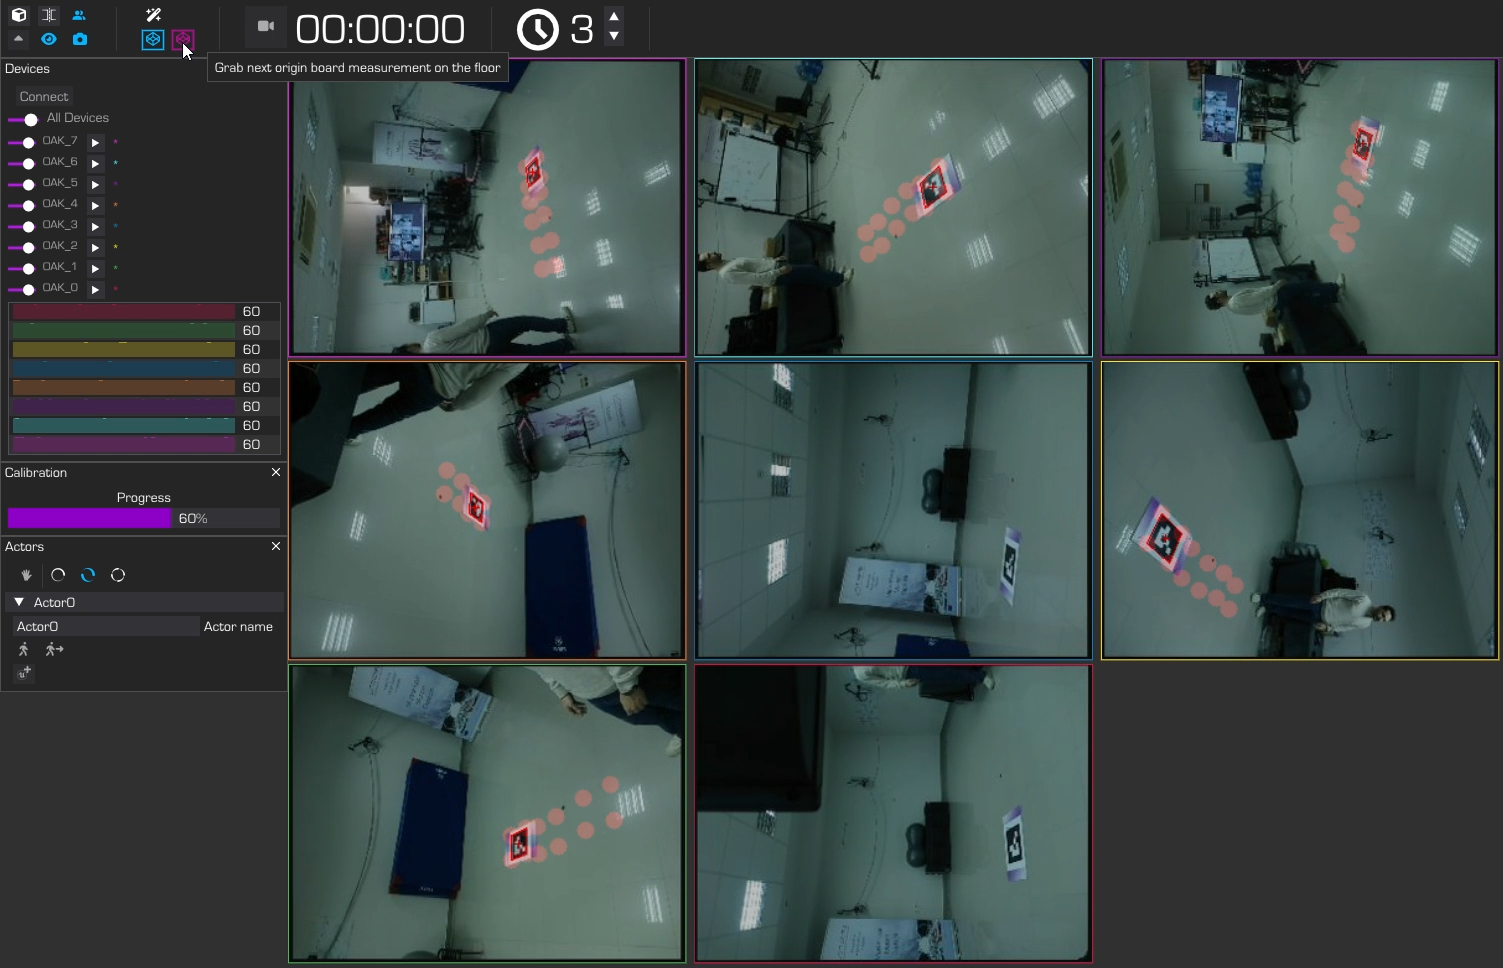
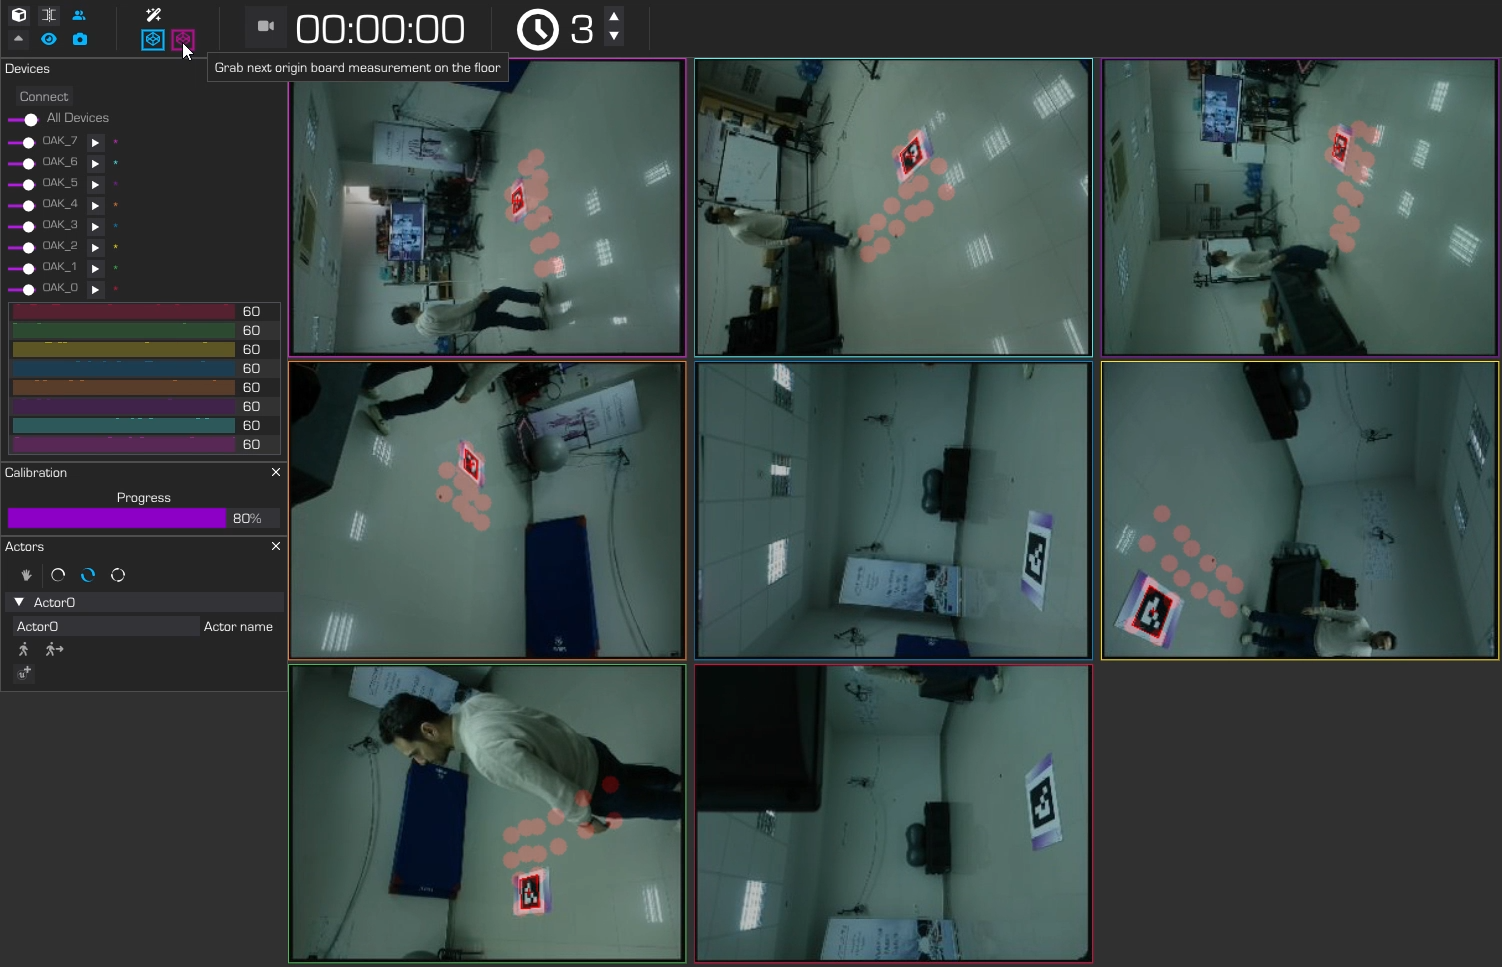
* Place the calibration board flat on the floor. You will need to take 5 measurements (until the progress bar reaches 100%). To take a measurement, press the magenta origin button that appears next to the icon when origin calibration begins. See the step-by-step visual example below for reference.
Step 1
Step 2
Step 3
Step 4
#### 2.2 Origin Calibration Completion
* Once the progress bar disappears, the ground plane and coordinate system are successfully set.
### Conclusion
The entire calibration process described above is shown in the following video:
With both steps complete, your system is fully calibrated and ready for body capture. If there are any calibration issues use the `get-help` channel in Moverse [Discord](https://discord.gg/bQc7B6qSPd) server.
 #### 1.6 Complete Calibration
* The process is complete when all bars reach 100%.
#### 1.7 Evaluate Calibration Quality
* After the calibration process finishes, assess the precision.
A bar will display the overall quality of the calibration.
The closer to the green side the better.
In case you feel not satisfied with the quality, please redo the process.
#### 1.6 Complete Calibration
* The process is complete when all bars reach 100%.
#### 1.7 Evaluate Calibration Quality
* After the calibration process finishes, assess the precision.
A bar will display the overall quality of the calibration.
The closer to the green side the better.
In case you feel not satisfied with the quality, please redo the process.
 {/* - Decide whether to accept the calibration based on the indicated quality. If the quality is insufficient, adjustments may be needed to improve the calibration. */}
### Step 2: Setting the Coordinate System Origin
#### 2.1 Place The Calibration Accessory
* Place the calibration board flat on the floor. You will need to take 5 measurements (until the progress bar reaches 100%). To take a measurement, press the magenta origin button that appears next to the
{/* - Decide whether to accept the calibration based on the indicated quality. If the quality is insufficient, adjustments may be needed to improve the calibration. */}
### Step 2: Setting the Coordinate System Origin
#### 2.1 Place The Calibration Accessory
* Place the calibration board flat on the floor. You will need to take 5 measurements (until the progress bar reaches 100%). To take a measurement, press the magenta origin button that appears next to the